Preparing Environment for iOS Mobile Testing with Rapise
Rapise lets you record and play automated tests against native applications on a variety of mobile devices running Apple iOS. Rapise gives you the flexibility to test your applications on either real or simulated devices.
This section explains how to set up your environment for mobile testing. Once that is done, you can then go to the section that explains the process for using Rapise to perform mobile testing.
Rapise uses a third-party, open-source tool called Appium that is used to host mobile devices, and Rapise communicates with them via Appium.
Important
The latest manual for configuring iOS testing is available in the knowledge base.
Testing Architecture
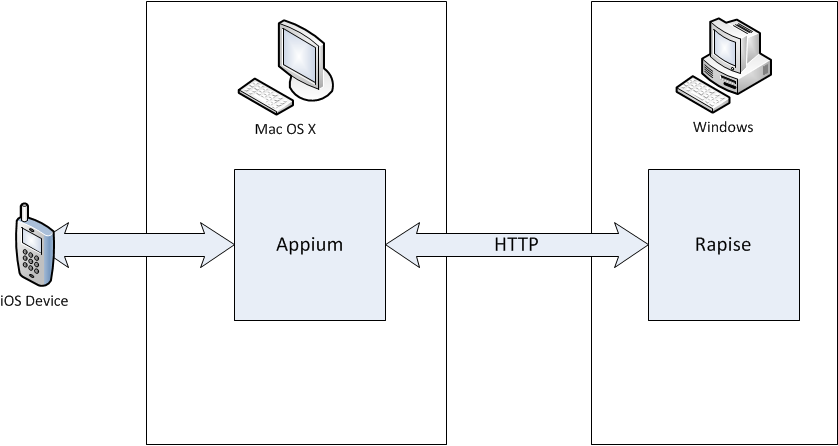
Since Rapise runs on Windows computers (PCs) and iOS devices (both real and simulated) can only be tested on an Apple Macintosh (Mac) computer, you need to install Appium and Apple Xcode onto the Mac and connect to Appium over the network from Rapise running on your PC.
For physical iOS devices, the architecture looks like:
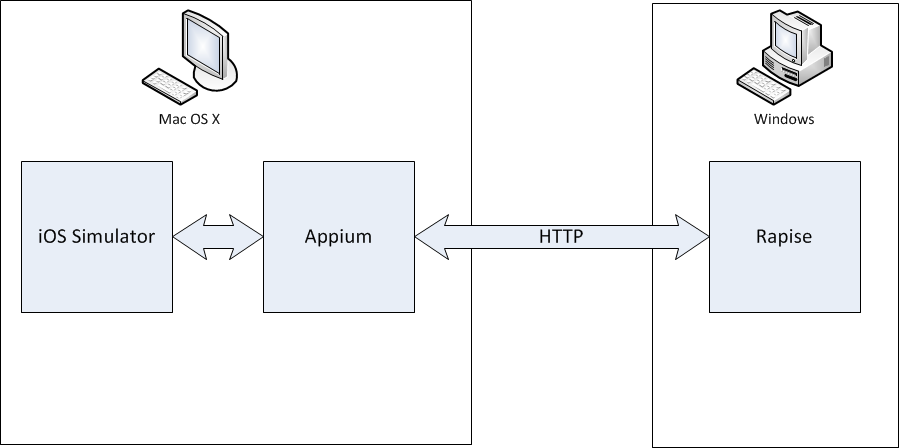
For simulated iOS devices (using the Xcode iOS Simulator), the architecture looks like:
Using a Mac to Host iOS Simulator and Devices
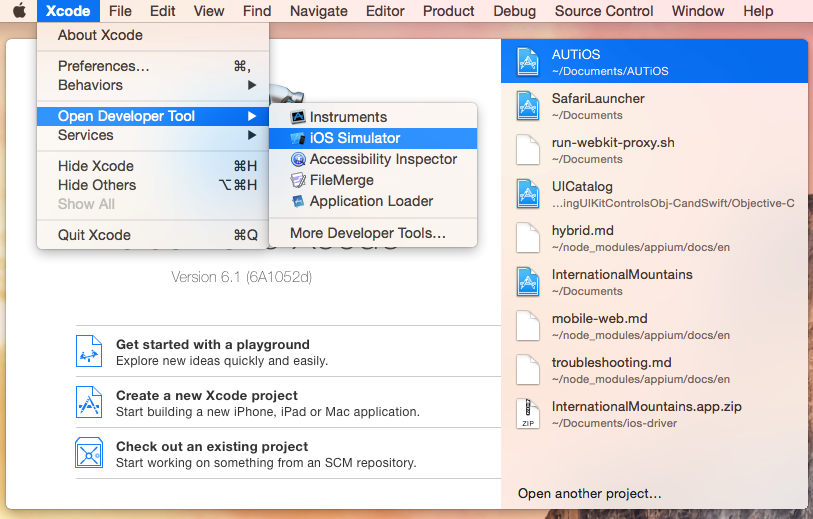
The first thing you need to do is install Xcode from the Apple Mac App Store. Make sure you include the iOS SDK and the iOS Simulator if you intend to test on simulated iOS devices.
(Please refer to the Apple tutorial if you are writing your first iOS application and need an introduction to developing for iOS).
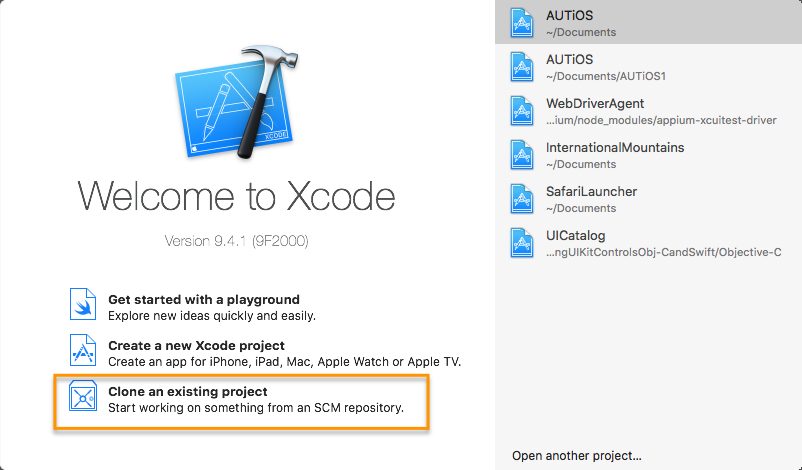
Get the AUTiOS Source Code
The sample iOS application is hosted in the AUTiOS Repository.
Launch Xcode on the Mac and check out the application from the repository:
Before you can build and deploy this project, you will need to register for an Apple ID and set up an Apple Developer account. You should check with your company to see if they have already joined the Apple iOS Developer Program; if not, you will need to join and become a member. You can learn more about this at the Apple developer website.
Join Your iOS Development Team
Assuming that either you or your company has already signed up for the iOS Developer Program, you will need to ask the administrator of your account (it might be you) to send you an invitation if you are not already a member. The link for accepting such an invitation is typically:
Click this link and accept the invitation.
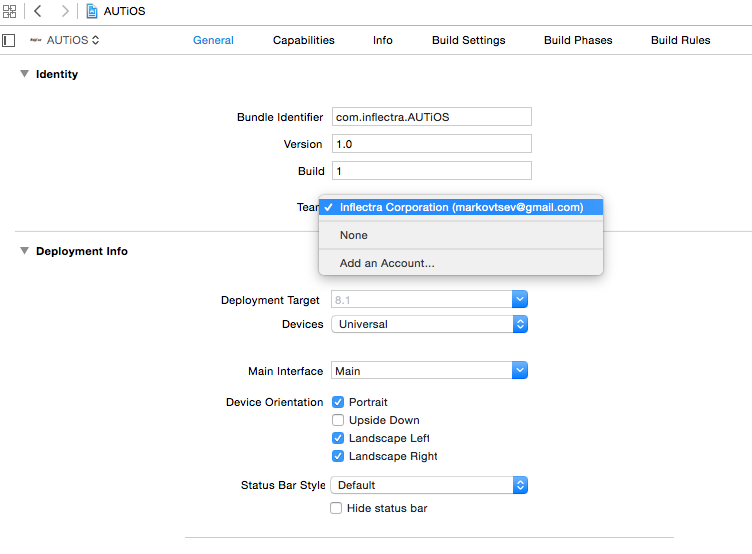
Meanwhile, back in Xcode, use the ‘Add an Account…’ option to log in with your Apple ID:
Building and Deploying on a Simulated Device
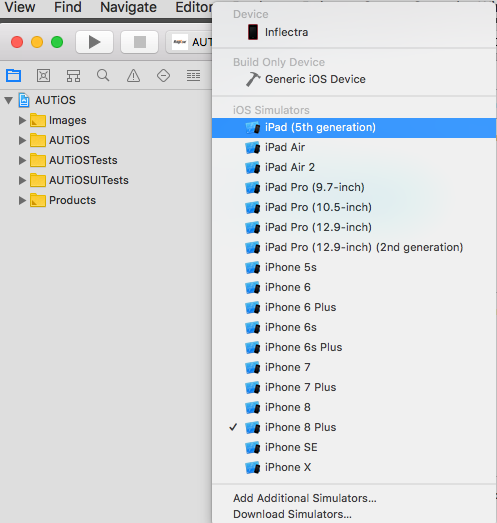
Now that you have signed into Xcode using your developer account, you can select a simulated device and run the project on it:
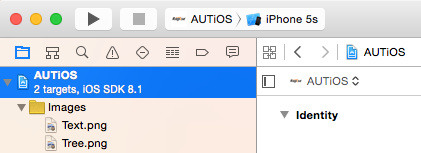
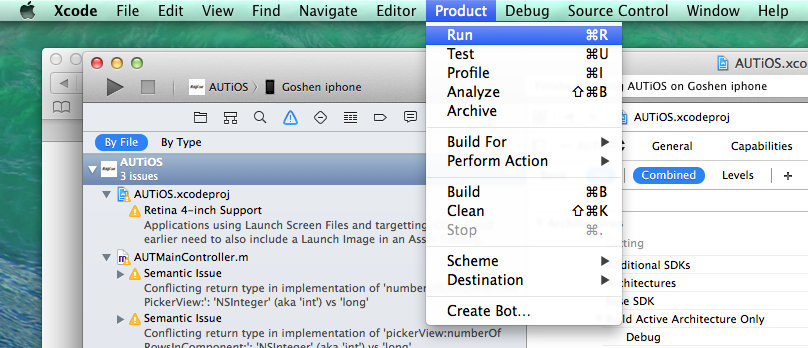
Once you have selected the simulated iOS device you want to use, click the Product > Build option to build the app for the targeted device. You can use the Run option to make sure that the app launches on this device before testing it with Rapise.
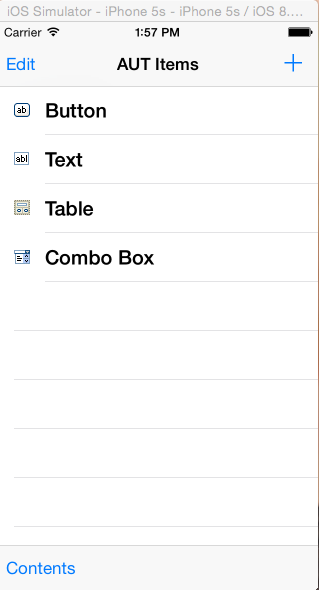
Assuming that this is successful, you will see AUTiOS running in the iOS Simulator:
If you are only going to use simulated devices (not recommended), then you can skip the next section and continue with setting up Appium, as described in the main Mobile Testing topic.
Building and Deploying on a Physical Device
Log in to http://developer.apple.com with your Apple ID.
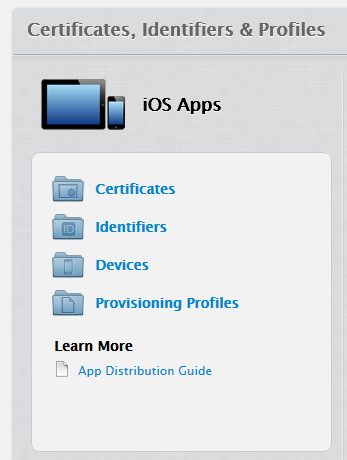
Choose Certificates, Identifiers & Profiles:
Select Devices:
Add your device's UDID to the list of registered iOS devices in the developer account:
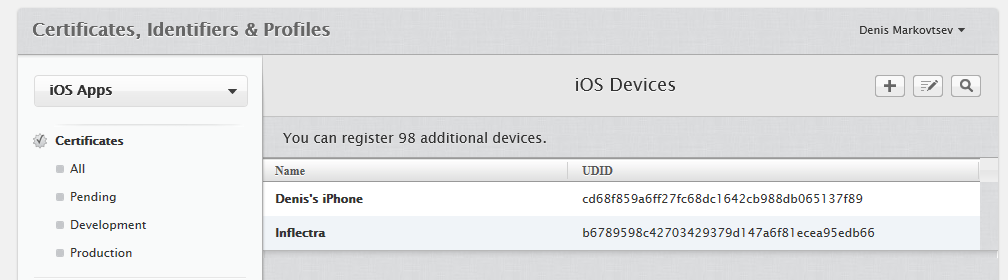
You can find the UDID by connecting the device to your Mac and viewing it inside Xcode.
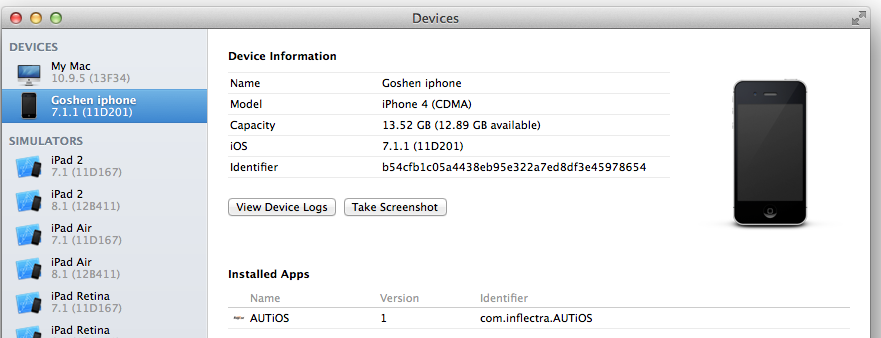
Then, back in Xcode, choose your physical device and use the Product > Build and Run option to test that the app launches on the device:
Installing Appium on the Mac
The first thing you need to do is install the latest version of Appium. The easiest way to install it is to use Terminal.
> brew install node
> npm install -g appium
More about Appium installation.
You are now ready to start mobile testing on your iOS simulator or device.