Preparing Environment for Android Mobile Testing with Rapise
Rapise lets you record and play automated tests against native applications on a variety of mobile devices using the Android operating system. Rapise gives you the flexibility to test your applications on either real or simulated devices.
This section explains how to set up your environment for mobile testing. Once that is done, you can then go to the section that explains the process of using Rapise for mobile testing.
Rapise uses a third-party, open-source tool called Appium to host mobile devices. Rapise essentially communicates with the device via Appium.
Important
The latest manual for configuring Android testing is available in the knowledge base.
Testing Architectures
Rapise runs on Windows computers (PCs). Android devices (both real and simulated) can be tested on either an Apple Macintosh (Mac) computer or a PC. This means there are two possible testing environments that you may need to set up:
-
Using a Mac to Host Android Emulator and Devices. It will be necessary to install Appium and Android Studio on the Mac and connect to Appium over the network from Rapise running on your PC.
-
Using a PC to Host Android Emulator and Devices. You can either install Appium and Android Studio on a separate PC or you can simply use the same PC that is running Rapise. The only difference will be whether the URL used to connect to Appium is a localhost URL or one pointing to the other PC.
The steps for setting up each of these will be described separately.
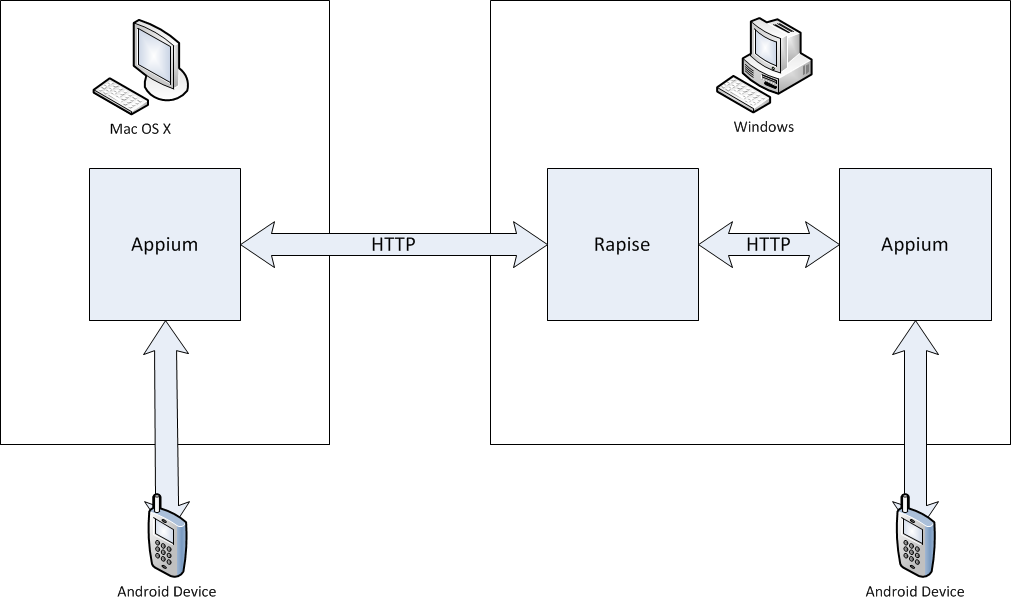
For physical Android devices, the architecture looks like this:
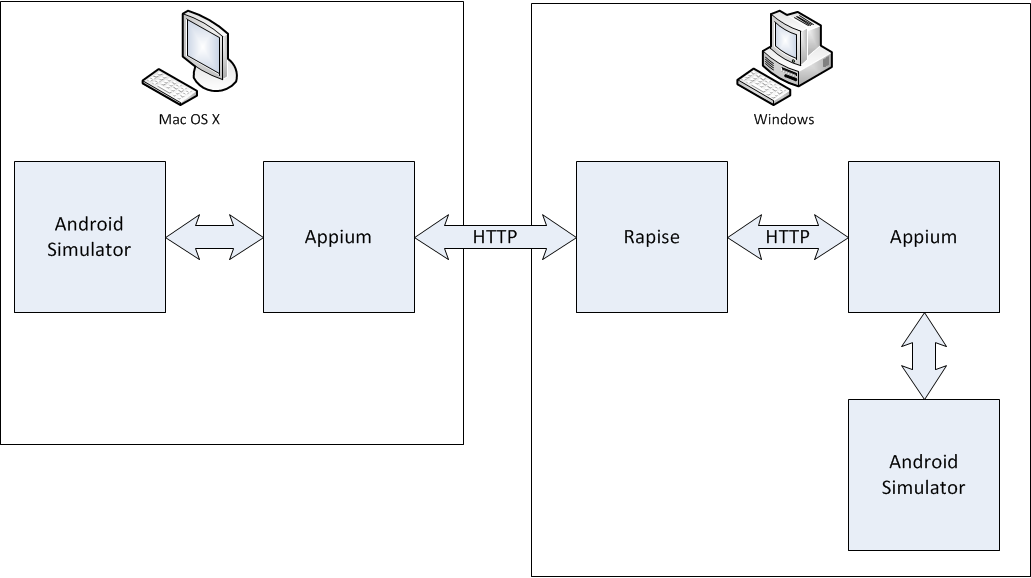
For simulated Android devices (using the Android Virtual Device Manager), the architecture looks like this:
Using a Mac to Host Android Emulator and Devices
The first thing you need to do is install the latest version of Appium. The easiest way to install it is to use Terminal.
> brew install node
> npm install -g appium
More about Appium installation.
Once Appium is installed, download and install the latest version of the Java SE Development Kit (JDK) from the Oracle website. After installation, make sure the JAVA_HOME environment variable has been set.
Next, install Android Studio (you may already have it installed if you do Android development). You can download it from the Android Developer site.
More about Android Studio installation.
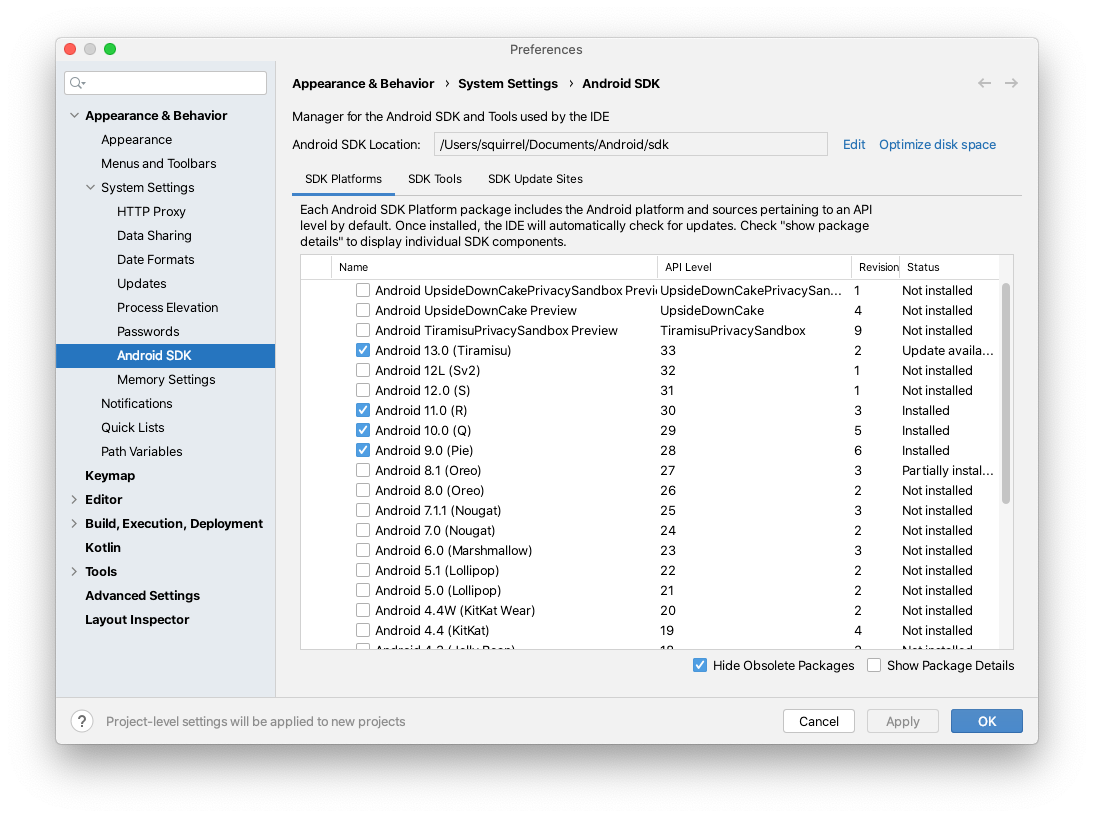
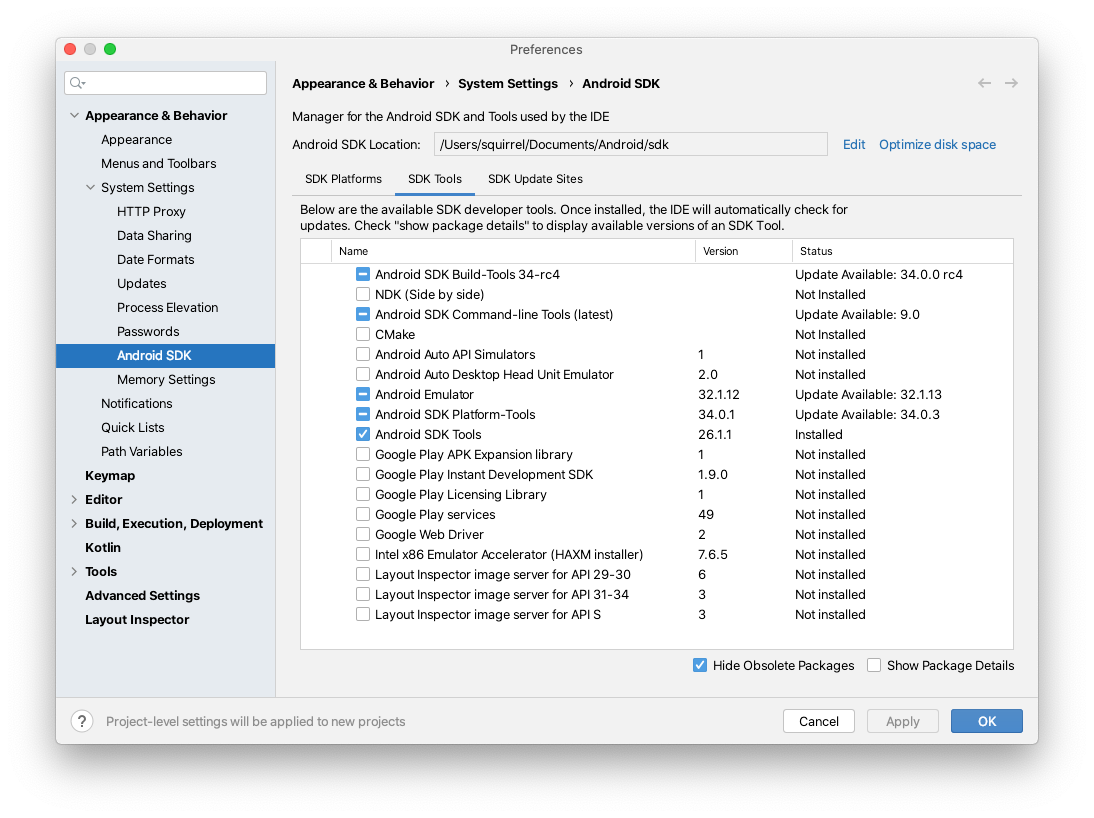
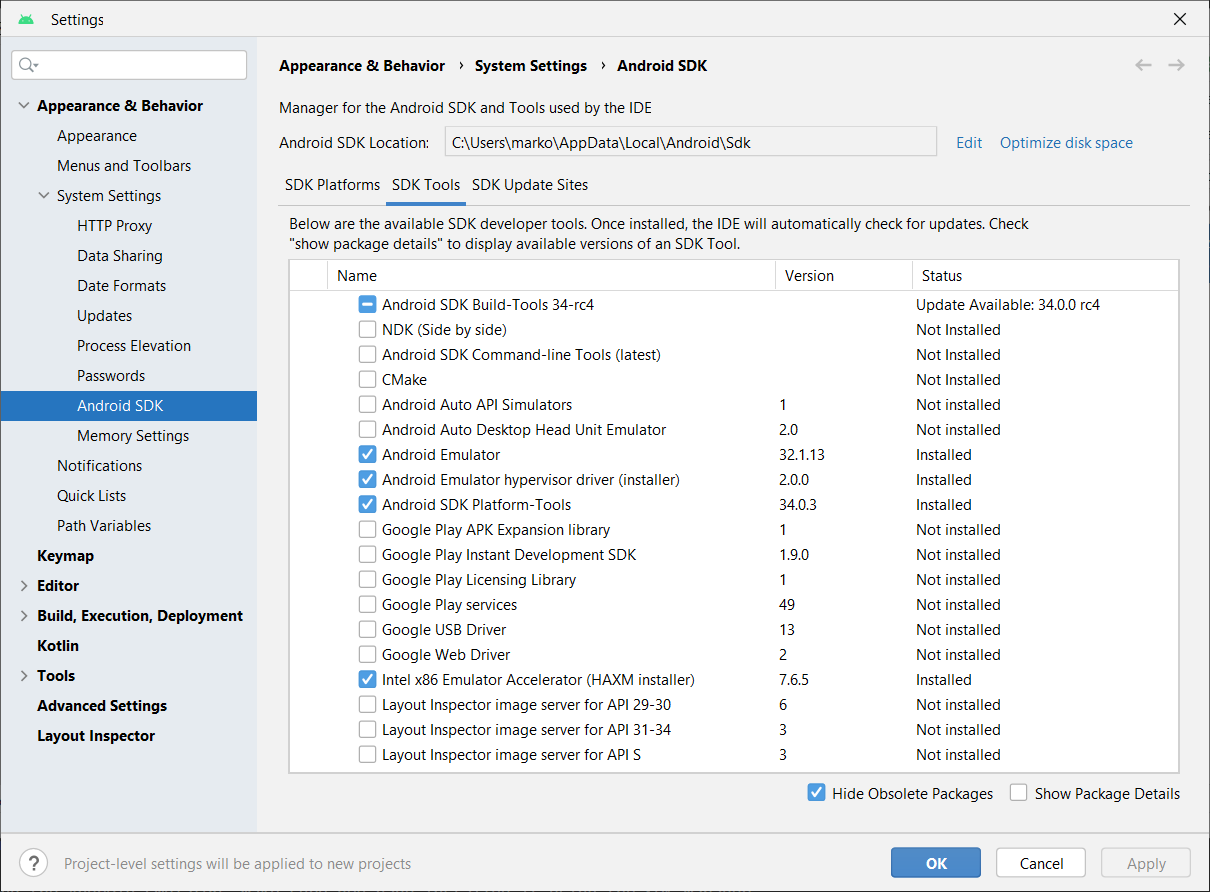
After installation, use the Android SDK Manager to download and install the necessary packages:
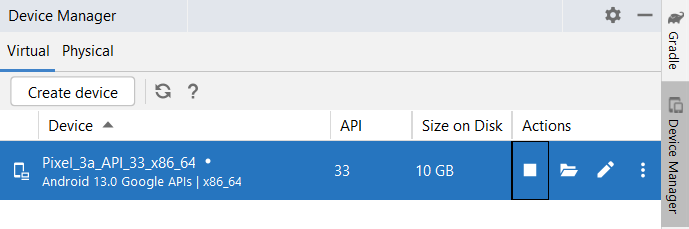
Preparing an Android Emulator
If you want to test using the Android Emulator, make sure you have installed it using the SDK Manager.
Then you can launch the Android Virtual Device Manager from the Android Studio main menu.

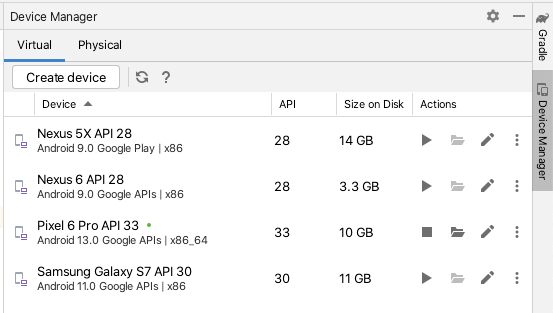
In this case, you can just create the Android Virtual Device, start it, and then connect to it using Rapise.
Preparing a Physical Android Device
If you are going to test a physical Android device, you will need to do the following.
The Settings app on Android includes a screen called Developer options that lets you configure system behaviors that help you profile and debug your app's performance.
Enable developer options and debugging
On Android 4.1 and lower, the Developer options screen is available by default. On Android 4.2 and higher, you must enable this screen as follows:
- Open the
Settingsapp. - Find the
Build numberoption (usually insideAbout phone). - Tap
Build number7 times. - Return to the previous screen to find
Developer optionsnear the bottom.
If you cannot find the Build number option, read more about Developer Options and USB Debugging.
At the top of the Developer options screen, you can toggle the options on and off.
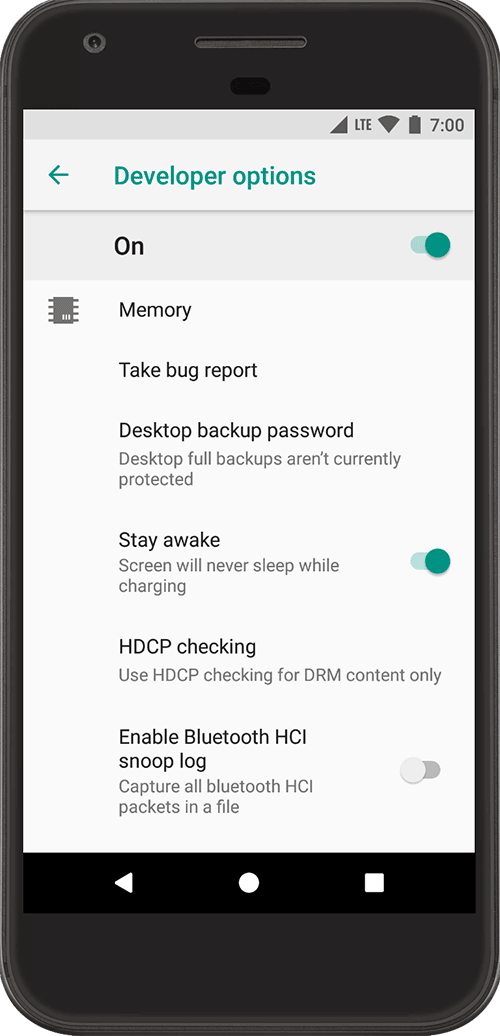
You should keep this on. When off, most options are disabled except those that don't require communication between the device and your development computer.
Next, scroll down and enable USB debugging. This allows Android Studio and other SDK tools to recognize your device when connected via USB, so you can use the debugger and other tools.
You are now ready to start mobile testing on your Android device and Android Emulator.
Using a PC to Host Android Emulator and Devices
The first thing you need to do is install the latest version of Appium. The easiest way to install it is to use the Command Prompt.
- Install NodeJS and NPM as described here.
- Install Appium
> npm install -g appium
Once Appium is installed, download and install the latest version of the Java SE Development Kit (JDK) from the Oracle website. After installation, make sure the JAVA_HOME environment variable has been set.
Next, install Android Studio (you may already have it installed if you do Android development). You can download it from the Android Developer site.
Make sure the ANDROID_HOME environment variable is set to point to the Android SDK. In most cases, it should point to:
c:\Users\<user name>\AppData\Local\Android\sdk
More about Android Studio installation
After installation, use the Android SDK Manager to download and install the necessary packages.

Preparing an Android Emulator
If you want to test using the Android Emulator, make sure you have installed it using the SDK Manager.
Then you can launch the Android Virtual Device Manager from the Android Studio main menu.
In this case, you can just create the Android Virtual Device, start it, and then connect to it using Rapise.
Preparing a Physical Android Device
The steps are the same as for Mac.