Java AWT/Swing Testing
Purpose
Rapise supports the testing of Java applications using either the Abstract Window Toolkit (AWT) or Swing graphical user interface toolkits. For maximum flexibility, Rapise can connect to a JVM of your choice.
Supported Java Versions
The Rapise Java Bridge is currently compatible with any version of the JRE, from Java 3 to Java 18.
For Java 9 and above, the Rapise Java Bridge works in both Windows Enterprise and non-Enterprise editions when the application runs with a Java JDK. For applications running with a Java JRE, it works only in Windows editions other than Enterprise.
Java Bridge Installation
The most flexible way to run a Java application with automation enabled is to modify the command line. This can be done using a .bat file that contains the necessary changes to the command line or environment variables.
For Java versions 8 or earlier, it is also possible to automatically install the Rapise Java Bridge as an extension. Installing this extension affects all applications launched by this Java instance.
Manual Installation (all Java versions)
Changing the Command Line
If your application is executed explicitly, for example:
java -cp . org.sample.MyButton
Then you need to add the following values:
set RAPISE_PATH=c:\Program Files (x86)\Inflectra\Rapise
set EXT_PATH=%RAPISE_PATH%\Extensions\JavaWrapper
set EXT_JARS=%EXT_PATH%\json.jar;%EXT_PATH%\jaccess.jar;%EXT_PATH%\smartestudio-bridge.jar
set EXT_OPTS=-Dsun.java2d.dpiaware=true -Djavax.accessibility.assistive_technologies=com.smartesoft.smartestudio.accessibility.AccessBridge

java.exe "%EXT_OPTS%" -cp "%EXT_JARS%";. org.sample.MyButton
If your application is executed using a JAR file, for example:
java -jar applet.jar
Then you need to determine applet.jar's main class and pass it explicitly to the application, ensuring the JAR is part of the classpath, for example:
set RAPISE_PATH=c:\Program Files (x86)\Inflectra\Rapise
set EXT_PATH=%RAPISE_PATH%\Extensions\JavaWrapper
set EXT_JARS=%EXT_PATH%\json.jar;%EXT_PATH%\jaccess.jar;%EXT_PATH%\smartestudio-bridge.jar
set EXT_OPTS=-Dsun.java2d.dpiaware=true -Djavax.accessibility.assistive_technologies=com.smartesoft.smartestudio.accessibility.AccessBridge

java.exe "%EXT_OPTS%" -cp "%EXT_JARS%";applet.jar com.smartesoft.java.aut.AwtFrame
Note that we removed the -jar switch and added applet.jar to the -cp input key.
If you have a .jar file and need to determine its main class, you can run cmd.exe in the folder containing the .jar and use a command like this (just replace applet.jar appropriately):
jar xf applet.jar META-INF/MANIFEST.MF & type .\META-INF\MANIFEST.MF & del /s/f/q META-INF & rmdir META-INF
The output should contain 'Main-class' (marked in yellow):
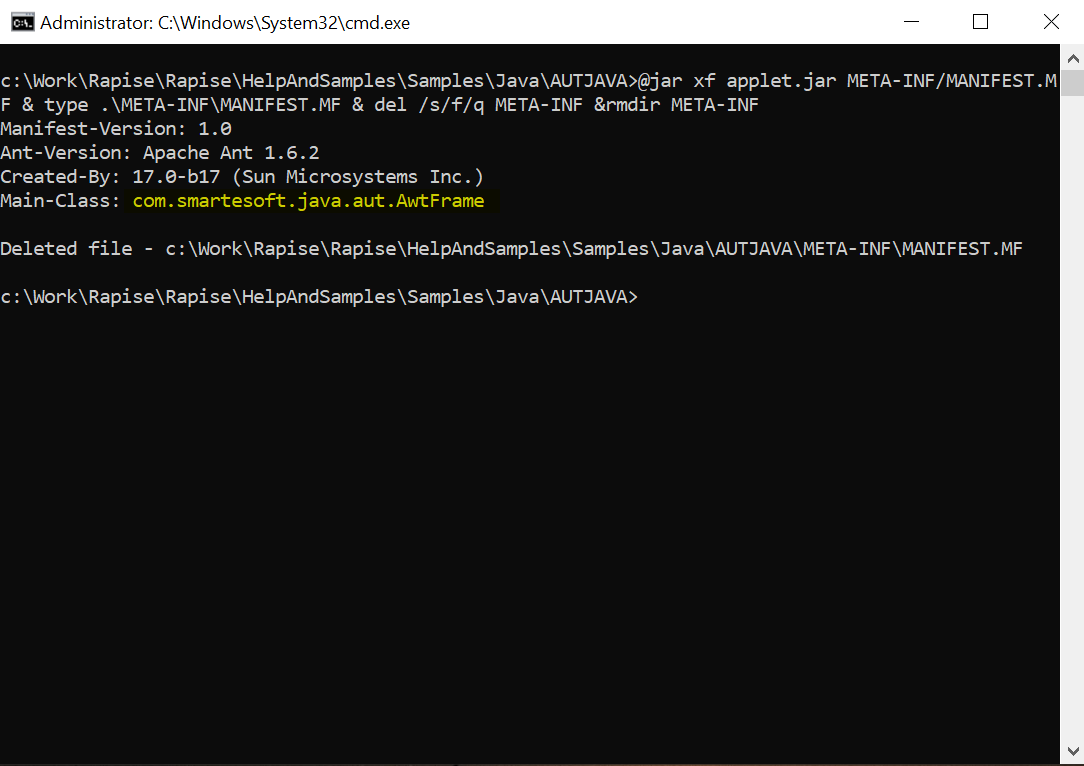
so you can copy it and use it in the modified application launcher.
Note: The sample Java shipped with Rapise contains
x86run.cmd, which launchesapplet.jarwith the Rapise Java Bridge enabled. You can use it as a reference.
Automatic Installation (Java 3-8)
To use a particular Java Virtual Machine (JVM) with Rapise, you need to install the Java Bridge into it. The installation process consists of several simple steps:
-
Click the
Settings > Javabutton. This will launch the Java Bridge Installation dialog: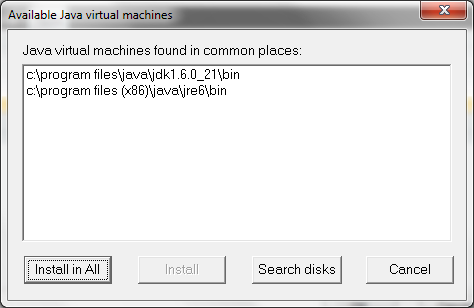
-
Choose the target JVM from the list of available Java machines and then press the 'Install' button.
-
Verify that the installation was successful.
To verify that the bridge installed correctly, check that the following files have been installed inside your Java VM (typically found at C:\Program Files (x86)\Java\jre1.x.x_xxx):
lib\accessibility.propertieslib\ext\jaccess.jarlib\ext\smartestudio-bridge.jarlib\ext\json.jar
If you don't see all three of these files, it means the bridge was not installed correctly.
Troubleshooting the Configuration
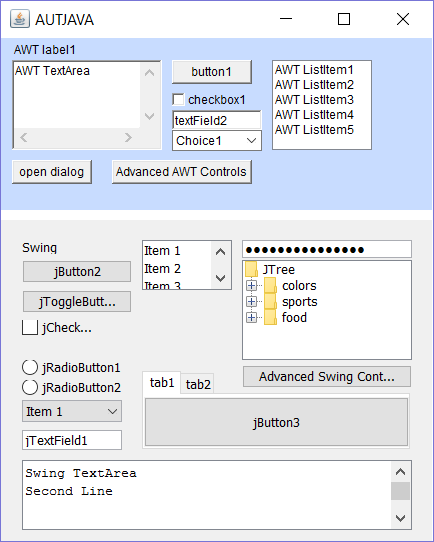
To help ensure your environment is set up correctly and to assist with trying out Rapise, we provide a sample application called AUTJava (AUT = Application Under Test), which can be found in the folder:
C:\Users\Public\Documents\Rapise\Samples\Java\AUTJAVA
To run the application, right-click on the x86run.cmd file and choose Run as Administrator.
If the application doesn't appear correctly, you may need to set the JAVA_HOME environment variable.
To do this, open the Windows Control Panel and choose System > Advanced System Settings:
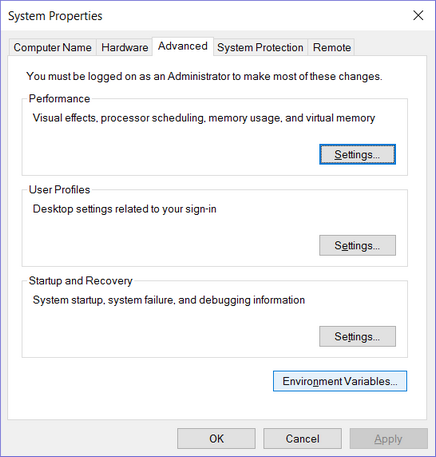
Click the Environment Variables button:
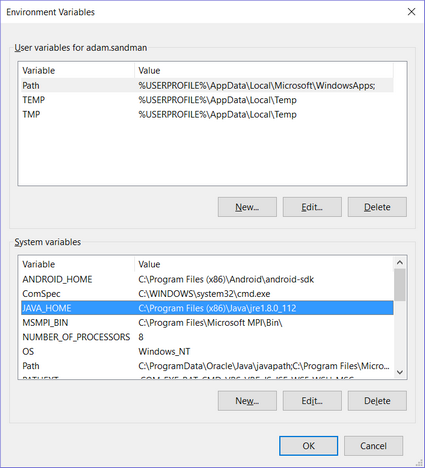
Click the option to add a System Variable, and then add the following:
- Variable:
JAVA_HOME - Value:
C:\Program Files (x86)\Java\jre1.x.x_xxx
(You will need to match the location of your actual Java VM.)
Now you should be able to launch the AUTJava sample application.
To verify that Rapise is configured correctly, click the Spy menu in Rapise and choose Java.
Then click the main Spy icon, and the Java Spy will start:
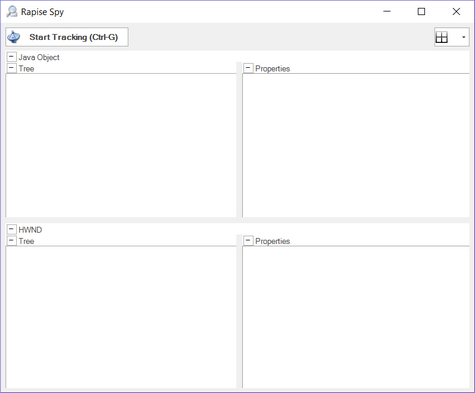
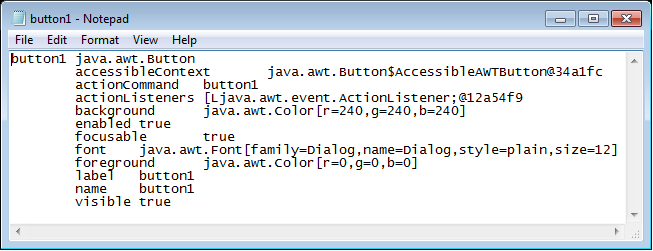
Click the Ctrl+G button combination to start tracking. Then, move the mouse over one of the buttons in the sample application and click Ctrl+G again. You should see the following:
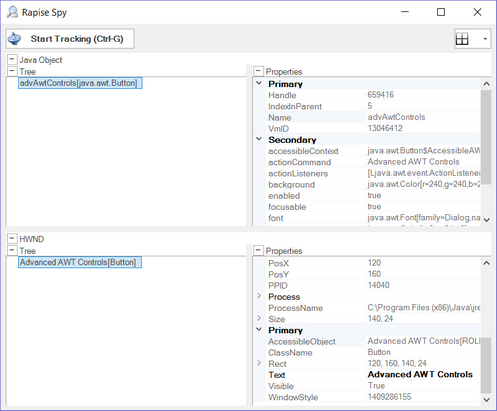
This shows that Rapise is able to see the AWT button (in this example) and its properties. However, if you see the following instead:
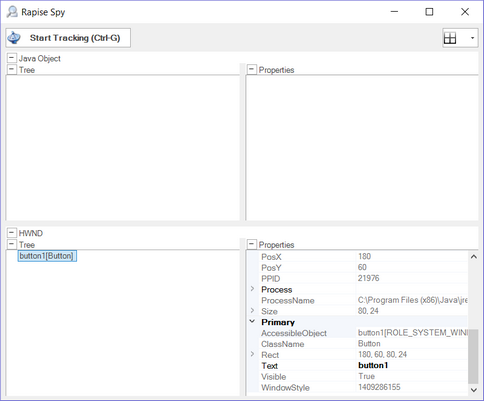
it means that you didn't run the sample application using "Run as Administrator". Close the application and try again using "Run as Administrator", and you will see:
You are now ready to start testing your real application. Make sure to also launch it using "Run as Administrator".
Analyzing the Java Application using the Java Spy
With Spy, you can navigate the tree of Java objects in your application.
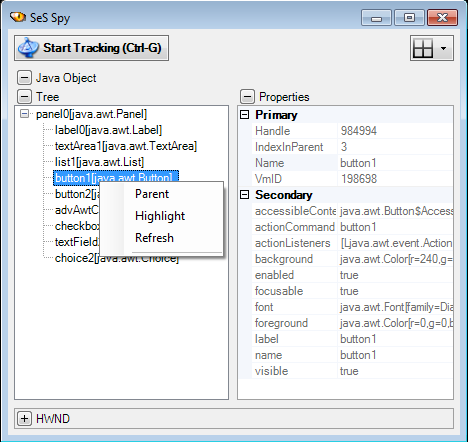
Save to File
You can save the Spy data for a particular node and all its descendants to a text file.
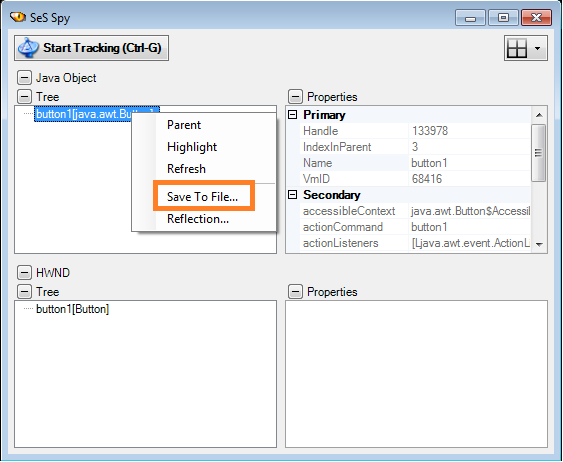
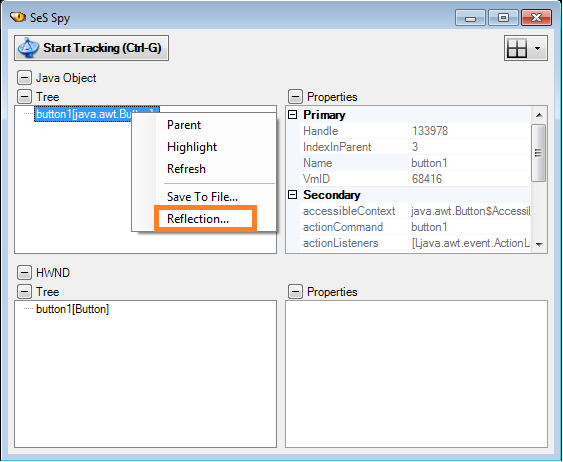
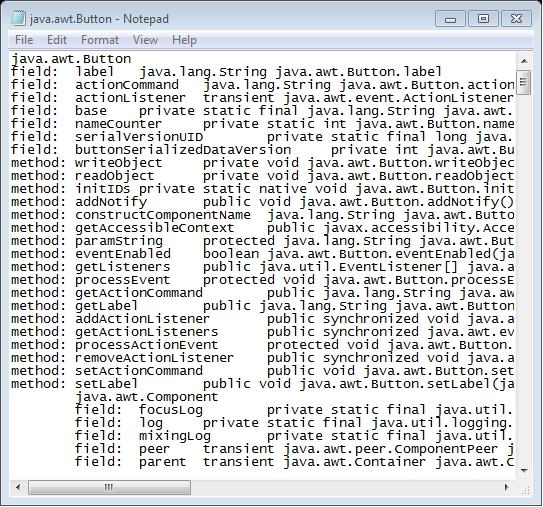
Reflection Information
You can save reflection information for a Java class used to implement a GUI control.