Automated Reporting
Purpose
Each time you play back a test, Rapise automatically generates a report detailing the test steps, the data values used, and the outcome of each step.
Usage
Execute your test using the instructions here. When the test is complete, a report file (ending in .trp) will open in the Content View. It will look like this:
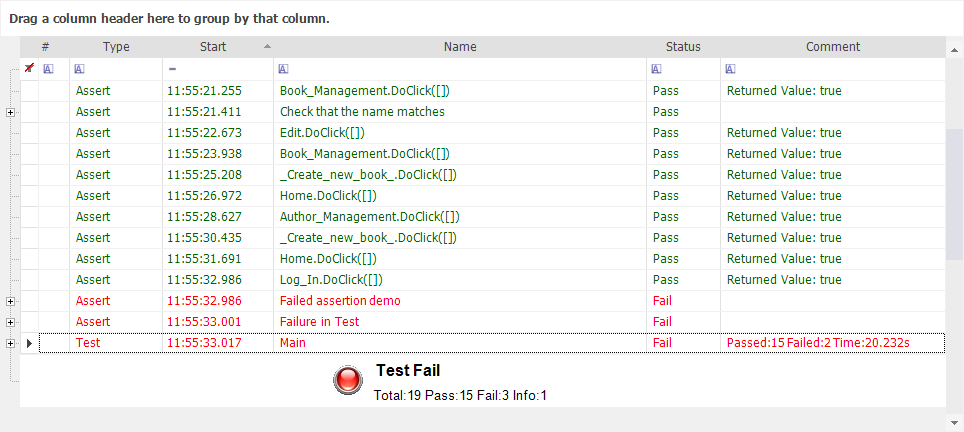
The first row (with a white background) is used for Report Filtering. The rows below that each represent a test step. The rows with green text represent success; the rows with red text represent failure. You can reposition the columns by dragging and dropping the column names.
The Columns
- #: Displays icons.
- Name: The test name.
- Start: The time the test step began executing.
- Type: Can be one of the following values: Test, Assert, or Message.
- Comment: Assertions and messages have associated comments, which are displayed here.
- Status: Indicates whether the step passed, failed, or was merely informational.
See also assertions for more information about possible types of report comparisons.
Spira Column Mapping
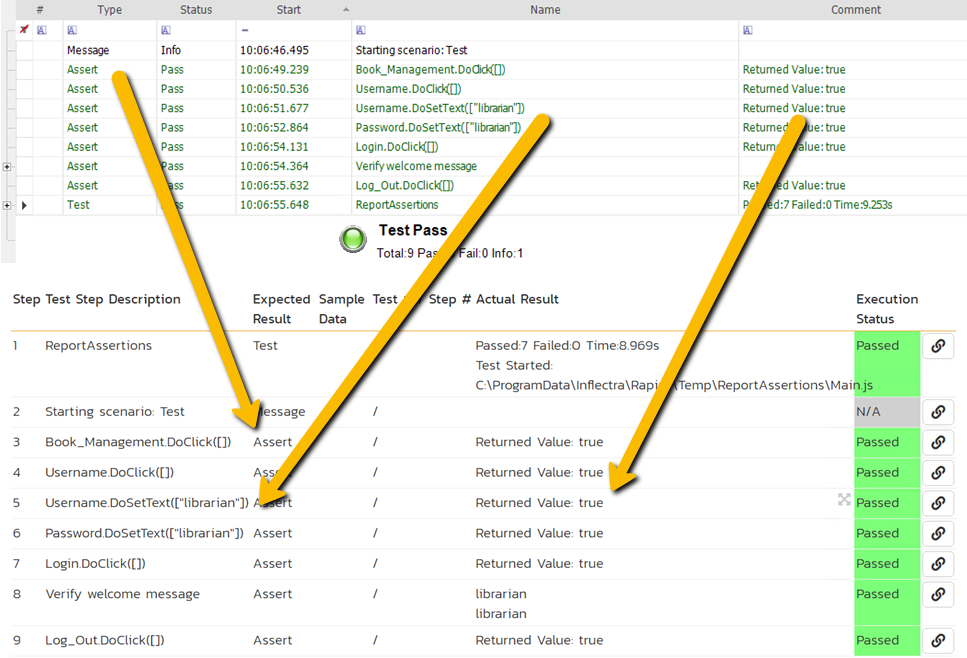
Whenever a test is executed using the RapiseLauncher, its results are uploaded to SpiraTest. The set of columns displayed by the Test Run Details view differs from the Rapise Report Viewer, so the following mapping is applied:
There is always a source .trp file attached to the test run; you may also find it in the test run's Attachments tab:
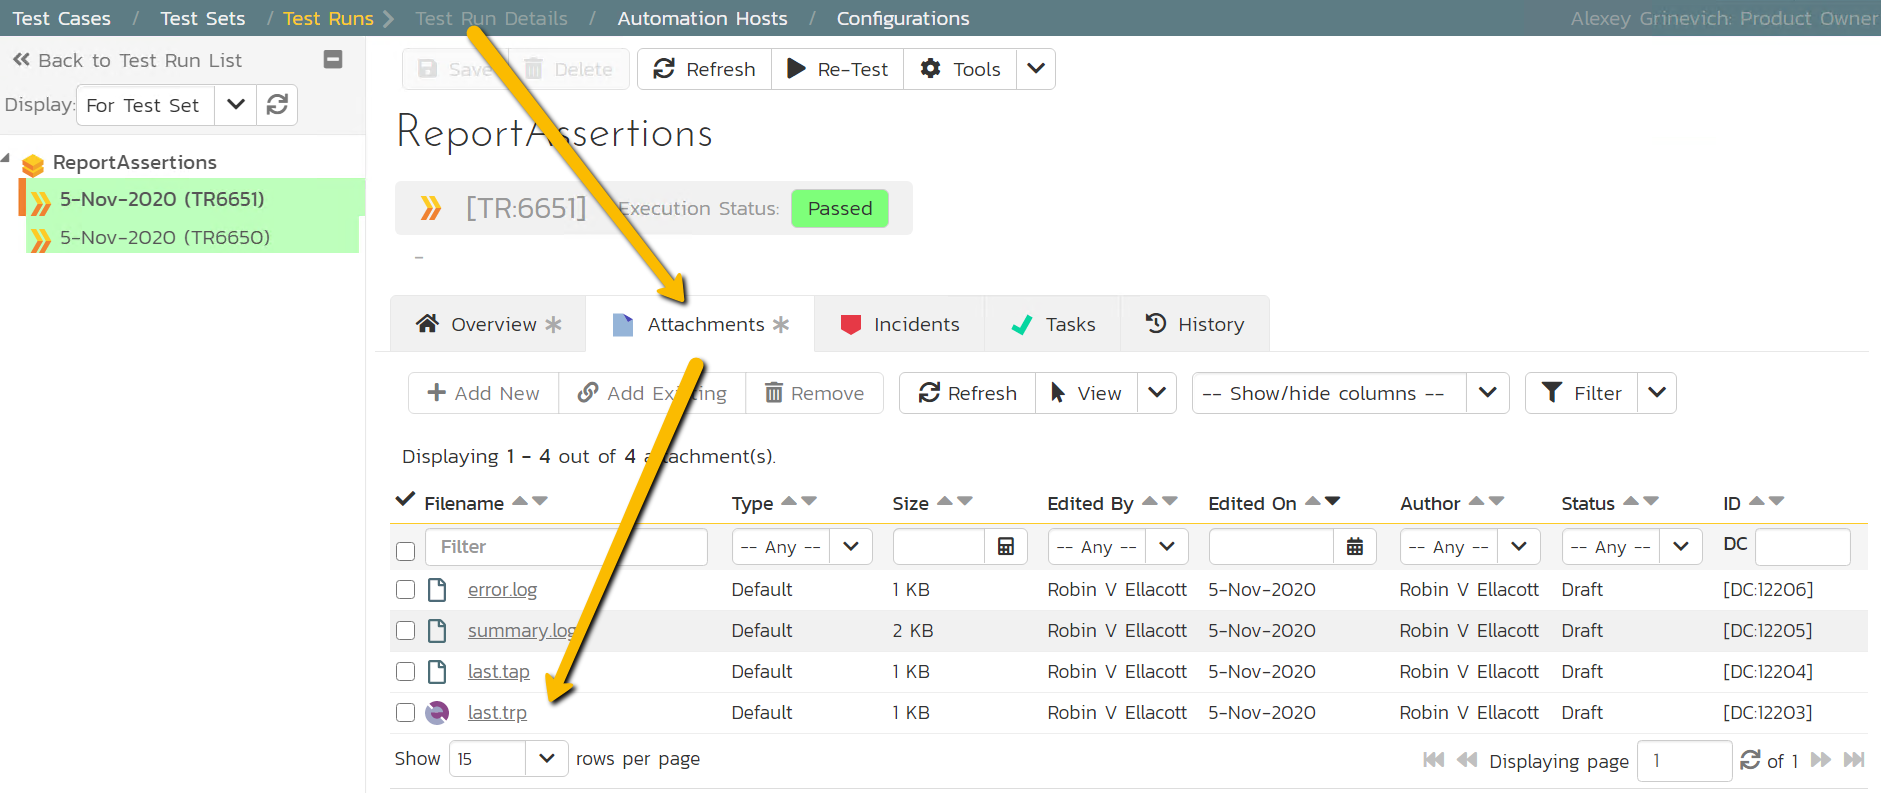
So you may download it and open it using Rapise to see the full-featured automated test report.
Custom Spira Column Mapping
You may have more fine-grained control over SpiraTest column display by applying the tags parameter to the Tester.Assert function.
    Tester.Assert(
        "Assertion Message",
        true,
        "Comment goes to ActualResult",
        {"expectedResult":"expected", "sampleData":"sampleData"}
    );
Note: Assertion message, ActualResult, or SampleData may contain a reference to the Manual Test Step in the format
[TS:X], whereXis the number representing the Test Step ID. This is useful when you are migrating manual test cases to automated scripts and want to maintain traceability to manual test steps in the report.
Report Formats
When a test is run, the report will be stored in the following formats:
.trp- The default Rapise test report format. Contains all information, status, and images. Rapise displays it using its built-in Report Viewer..tap- Pure text, Test Anything Protocol-formatted output. Usually saved aslast.tap. It is the simplest way for integrating tests into external or custom execution pipelines.index.htmlandimageNNN.png- Flow output. It is saved in the<test folder>\Reports\<Date_Time>\folder: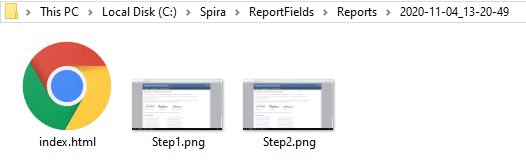
Export Report
Reports can be exported as .xls, .pdf, .xps, or .html using the Report pop-up menu.
Export as HTML Dialog
HTML export supports a number of templates. Therefore, if you select Report/Export as HTML, you will then need to specify the export format using the following dialog:
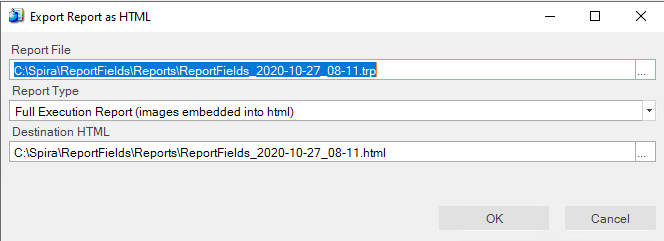
Report File – The source .trp file to be used for export.
Report Type – Choose one of the following export templates:
- Full Execution Report (images embedded in HTML) - A full report, combined into a single file.
- Full Execution Report (images saved as separate files) - The same as the previous option, but all images are saved alongside the main
.htmlfile. - High-level report (only test status) - A short report containing only test-level status.
Destination HTML – The path to the target .html file.
Exporting Report With JavaScript
This type of export can also be performed from JavaScript code.
    var ldr = new ActiveXObject("Rapise.LogLoader");
    ldr.LoadTrp("Reports\\ReportAssertions_2020-11-04_15-20.trp");
    ldr.ExportAsHtml("C:\\Program Files (x86)\\Inflectra\\Rapise\\Extensions\\TrpExporter\\FullReportImgTpl.tt", "FullReport.html");
If you want to perform post-processing of the report for a specific test case, you can combine this code with the SeSOnTestReportReady event. This event allows you to execute custom code when the test report for a given test case is ready.
Column Grouping
The Report Viewer enables grouping rows by column values. Just drag the column header to this section:

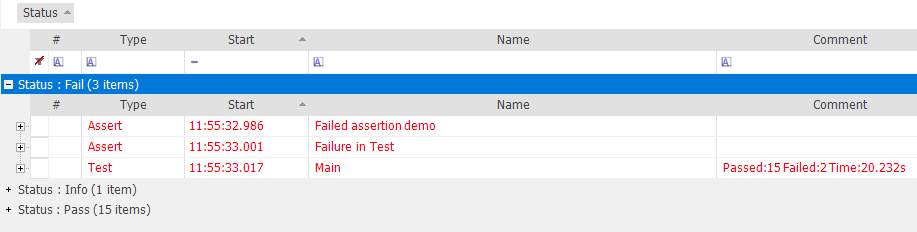
This section allows you to group and order rows by the values in the chosen column. The result of dragging the Status column over looks like this:

You can expand each item to see the corresponding report rows:
Drag the Status icon back to undo the grouping:

TODO Rows
Whenever a Name column value starts with TODO, the viewer automatically performs the following actions:
-
If a report row's Type is Info, it is highlighted in yellow, and the TODO counter is incremented:
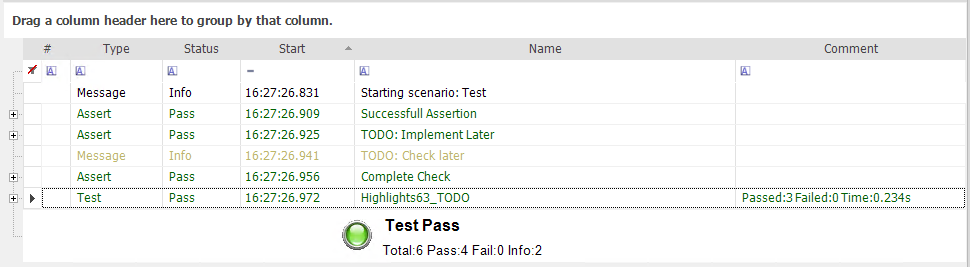
-
If a report row's Type is Assert, it remains green or red, but the TODO counter is still incremented.
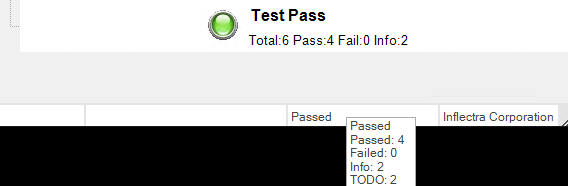
If you hover over the last execution status in the Rapise main window, the tooltip will then contain the total number of TODO items found in the report (i.e., the TODO counter):
See Also
- Report Filtering
- The report output file is specified in the Settings Dialog under Settings > ReportPath.