Tutorial: Java Testing (JavaScript)
In this section, you will learn how to record and execute a Rapise script against Java applications. We will show you how to test the following three different types of Java applications:
- Java AWT Apps
- Java Swing Apps
- Java SWT Apps
This version of the tutorial uses the JavaScript test editor option in Rapise. If you'd prefer to use the Rapise Visual Language (RVL), please refer to the main Tutorial instead.
Example 1 - Launching the Sample AWT/Swing Application
On the Start Page of Rapise, click the Fetch Samples button to ensure you have all the latest samples available.
Then, navigate to
1 | |
and right-click the x86run.cmd file and choose Run as Administrator.
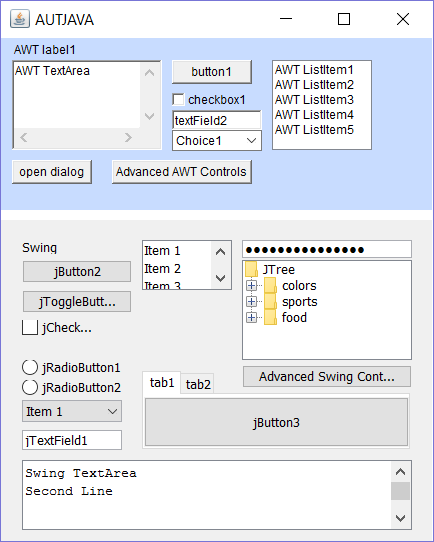
If Java is configured correctly, you will see:
If the application doesn't start correctly, ensure Java SE and the Rapise Java Bridge are installed, and the JAVA_HOME environment variable is correctly set to your Java Runtime (JRE). For more details, please refer to: Java AWT/Swing Testing.
Once the application is started, open Rapise and click File > New Test:
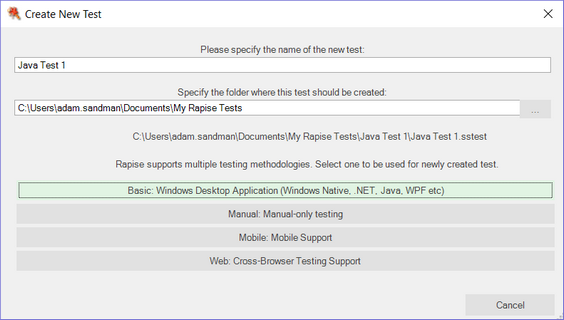
Enter Java Test 1 as the name and choose Basic: Windows Desktop Application as the methodology.
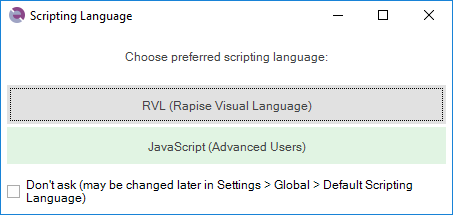
Choose the JavaScript option during test creation, instead of RVL.
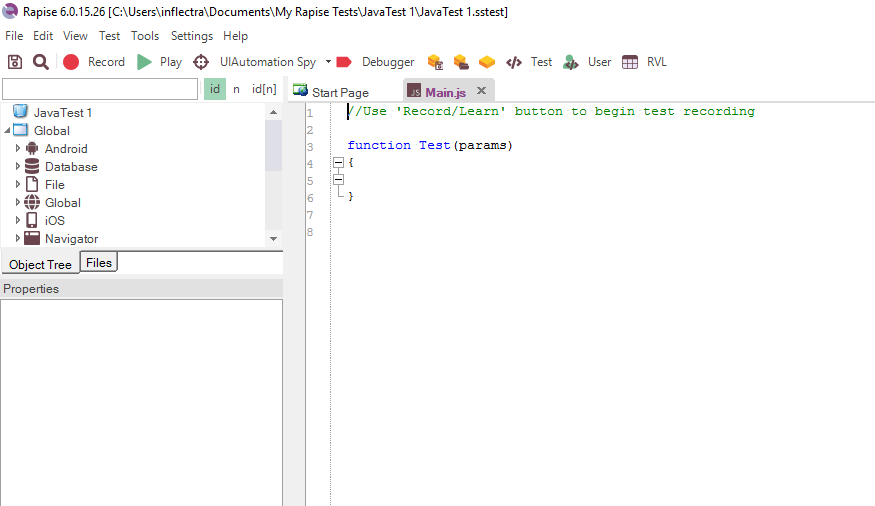
Once the test is created, you will see:
Click the Record button to display the "Select an Application to Record" dialog:
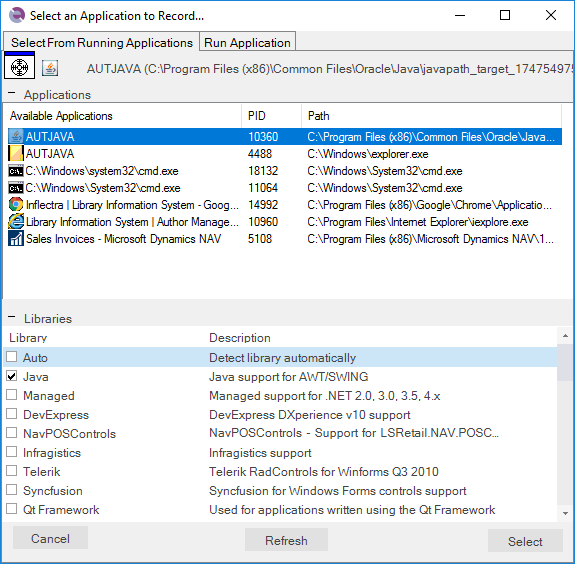
Choose the AUT JAVA process from the list of running applications, change the library selection from Auto to Java, and click Select.
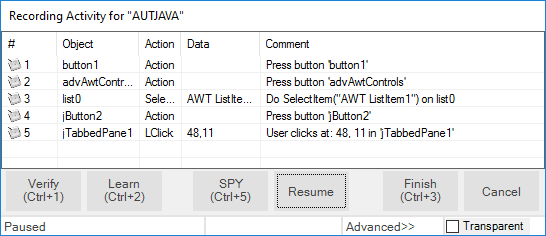
Now, in the sample application, click some of the AWT and/or Swing controls. Rapise will record your actions:
When you click Finish, you will see the recorded test script and learned objects:
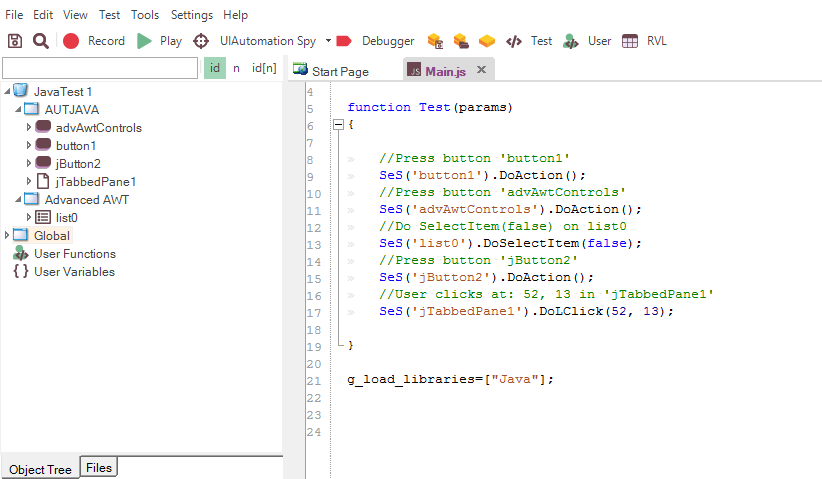
You can drag and drop any learned objects from the left-hand pane into the main test script. You can also simply type SeS("button1") (for example), and Rapise will display the list of available functions.
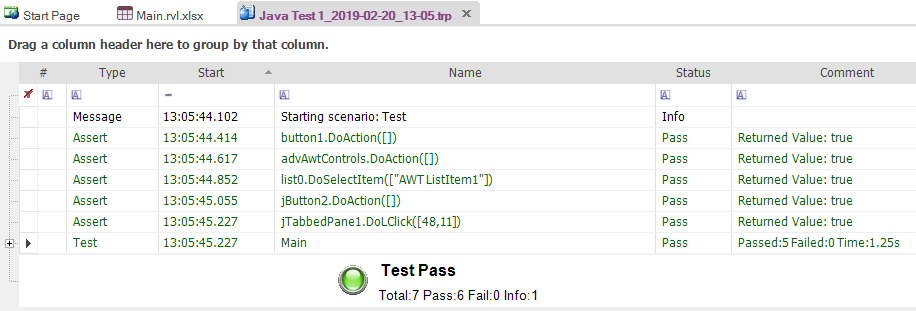
When you click Play, Rapise will play back your test script against the application:
Sometimes, you need to learn objects that are not visible or are obscured by other objects. To assist with this, Rapise provides the Object Spy tool. The Spy tool allows you to view the objects in the application within a hierarchy that you can learn. While recording, click the Spy button, and Rapise will display the Java Spy:
You can then use the Java Spy to track and find objects within the application hierarchy. You can navigate to parent objects by right-clicking them and choosing Parent. Once you have found the desired object, click the Learn Object button in the Spy toolbar, and Rapise will add the object from the Spy to the list of learned objects that you can test against.
Example 2 - Launching the Sample SWT Application
On the Start Page of Rapise, click the Fetch Samples button to ensure you have all the latest samples available.
Then, navigate to
1 | |
and double-click the JavaSWTAUT.bat file to start the sample application.
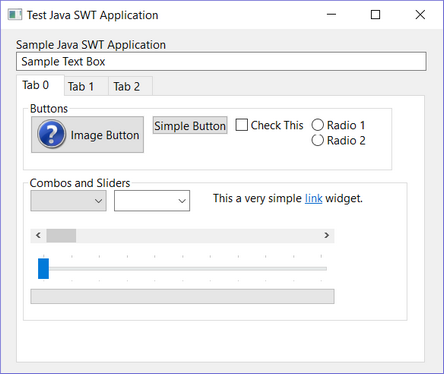
If Java is configured correctly, you will see:
If the application doesn't start correctly, ensure Java SE is installed and the JAVA_HOME environment variable is correctly set to your Java Runtime (JRE). For more details, please refer to: Java SWT Testing.
Once the application is started, open Rapise and click File > New Test:
Enter Java Test 2 as the name and choose Basic: Windows Desktop Application as the methodology.
Choose the JavaScript option during test creation, instead of RVL.
Once the test is created, you will see:
Click the Record button to display the Select an Application to Record dialog:
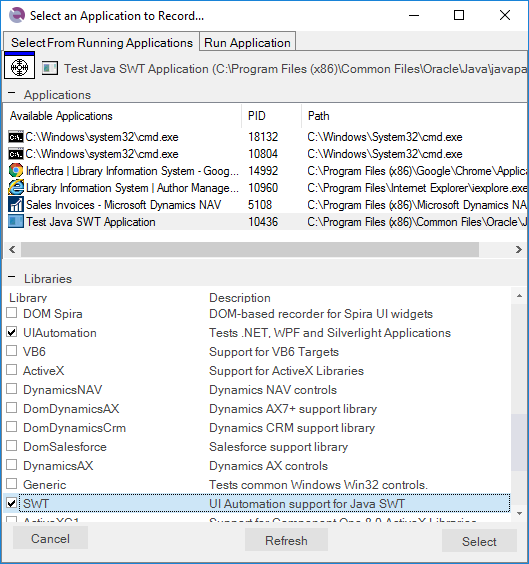
Choose Test Java SWT Application from the list of running applications, change the library selection from Auto to UI Automation and SWT, and click Select.
Now, in the sample application, click some of the SWT controls. Rapise will record your actions:
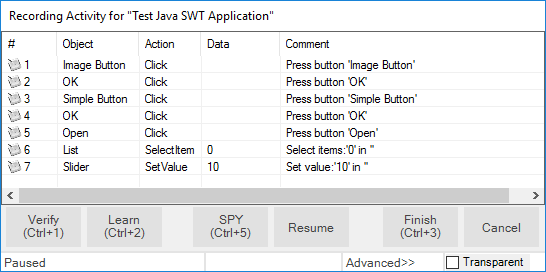
When you click Finish, you will see the recorded test script and learned objects:
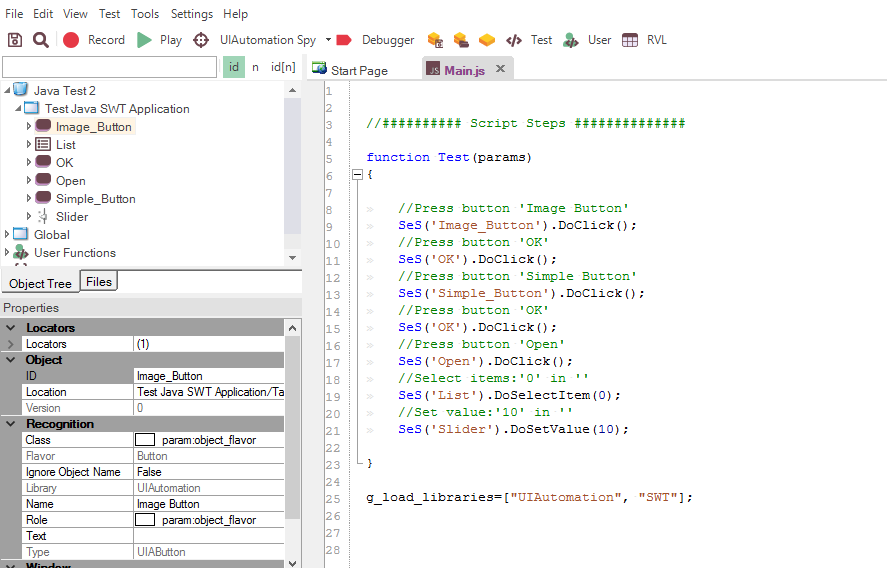
You can drag and drop any learned objects from the left-hand pane into the main test script. You can also simply type SeS("OK") (for example), and Rapise will display the list of available functions.
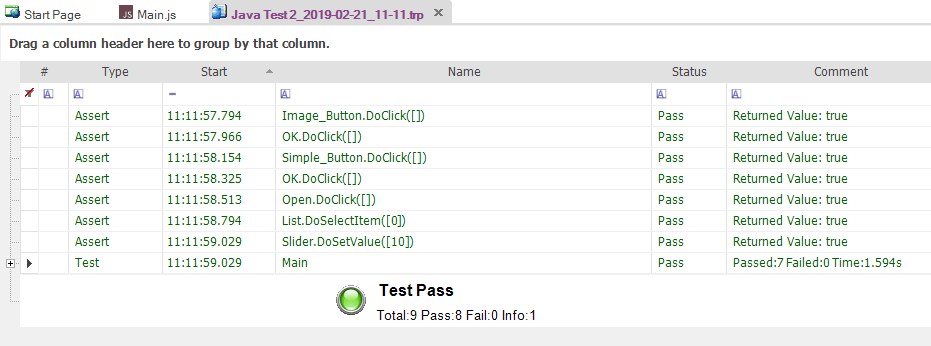
When you click Play, Rapise will play back your test script against the application:
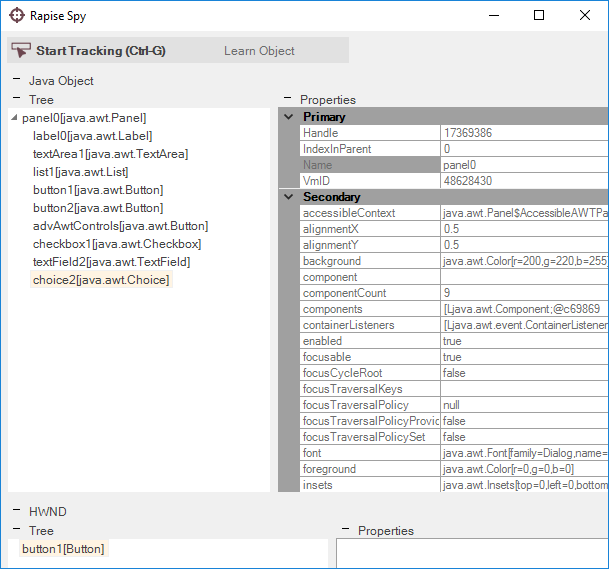
Sometimes, you need to learn objects that are not visible or are obscured by other objects. To assist with this, Rapise provides the Object Spy tool. The Spy tool allows you to view the objects in the application within a hierarchy that you can learn. While recording, click the Spy button, and Rapise will display the UIAutomation Spy:

You can then use the UIAutomation Spy to track and find objects within the application hierarchy. You can navigate to parent objects by right-clicking them and choosing Parent. Once you have found the desired object, click the Learn Object button in the Spy toolbar, and Rapise will add the object from the Spy to the list of learned objects that you can test against.