Manual Testing: Playback
Purpose
As described in the main Manual Testing topic, it is sometimes not possible to automate the testing of a specific application. However, Rapise is also a powerful manual testing tool that allows you to execute manual test cases stored in SpiraTest.
The advantage of using Rapise to execute manual tests (instead of simply using SpiraTest itself) is that Rapise can display the execution window as a small, minimizable dialog box, which eliminates the need for two screens (one for the test and one for the application). Additionally, Rapise provides superior image manipulation tools compared to those available in a web application.
Step 1 - Open the Manual Test
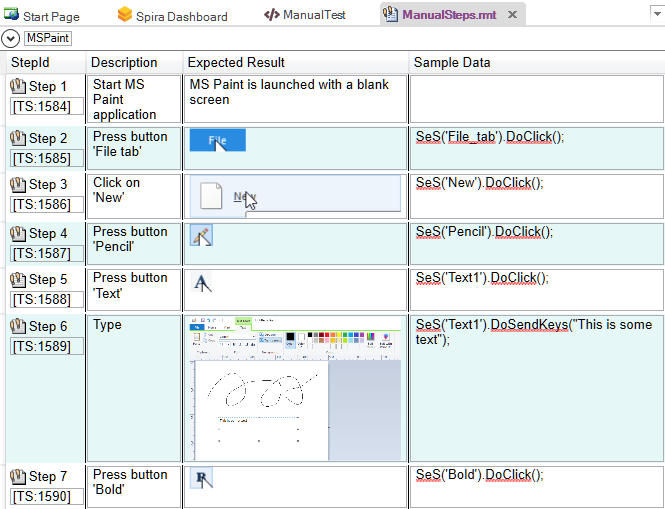
Using the MS-Paint example manual test that you created previously, open the test in Rapise. Click the Tools > Manual Steps menu, and you should see the list of test steps:
Now that the test is open, you can start the playback.
Step 2 - Executing the Manual Test
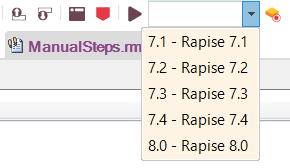
Choose the Release from the list available in the project:
Then click the Execute icon to start manual test execution. This will display the manual playback screen:
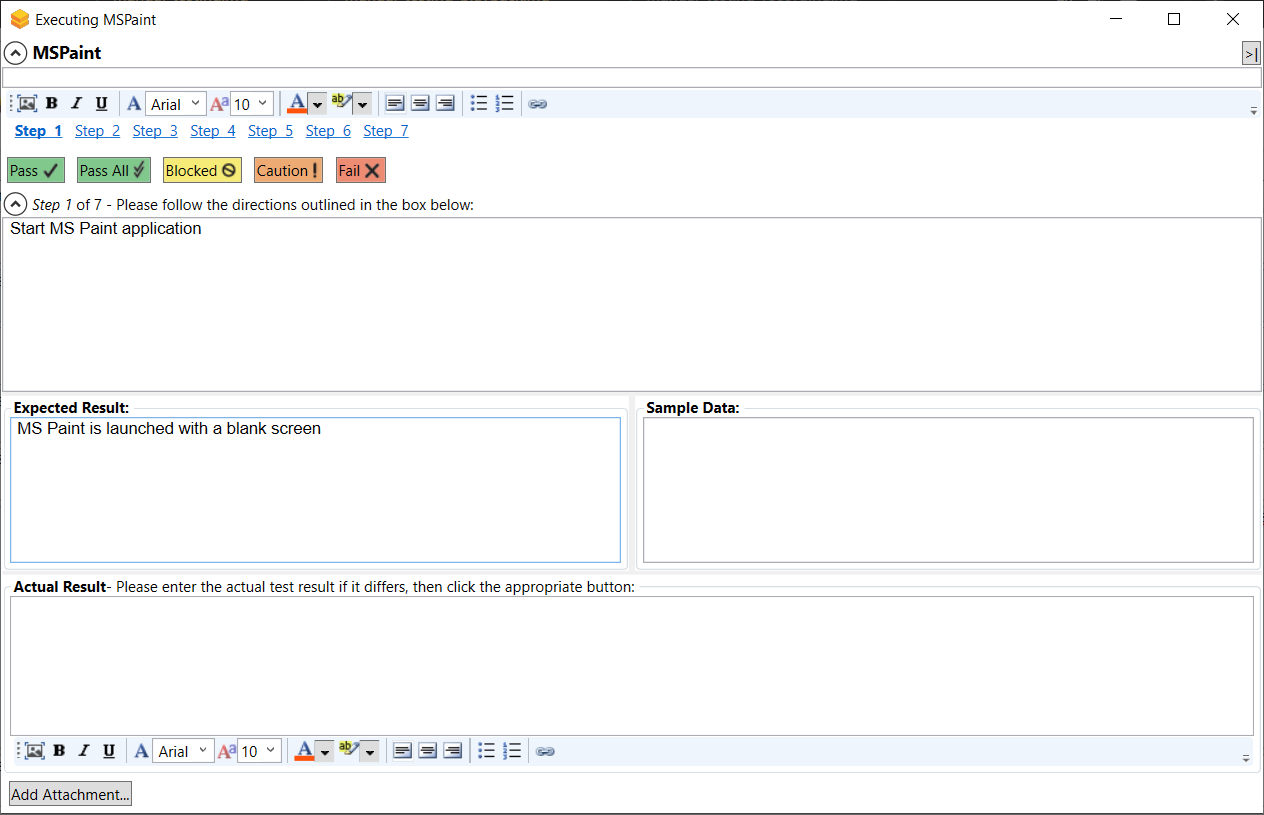
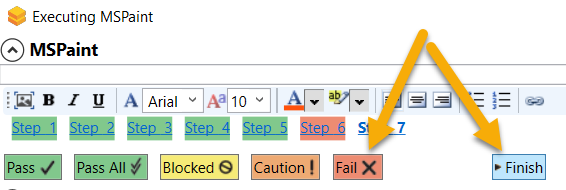
On this screen, you will follow the steps listed in the test case. This involves opening MS Paint, creating a new canvas, adding some lines using the pencil, and then adding some text using the text tool. As you perform these steps, click the Pass button to indicate that each step has passed. You can also minimize the manual playback screen by clicking the >| button.
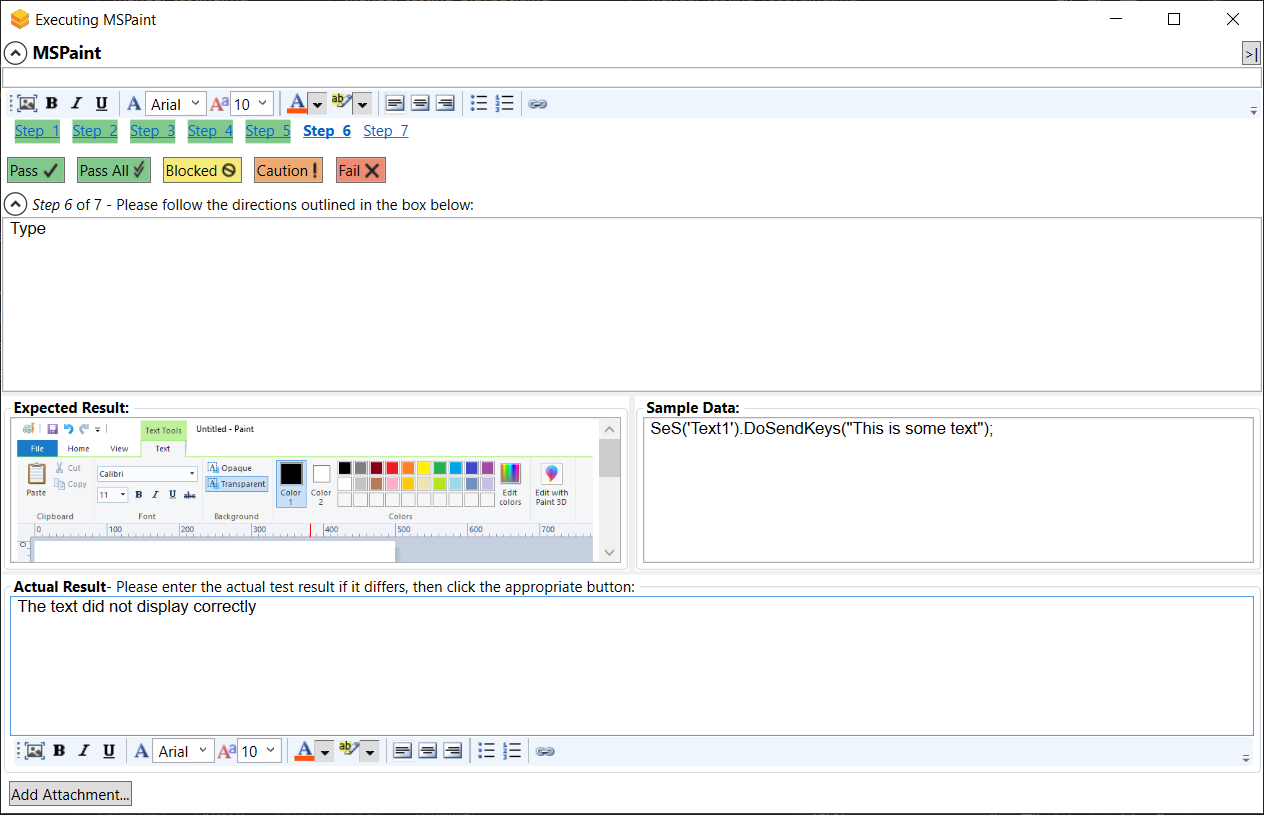
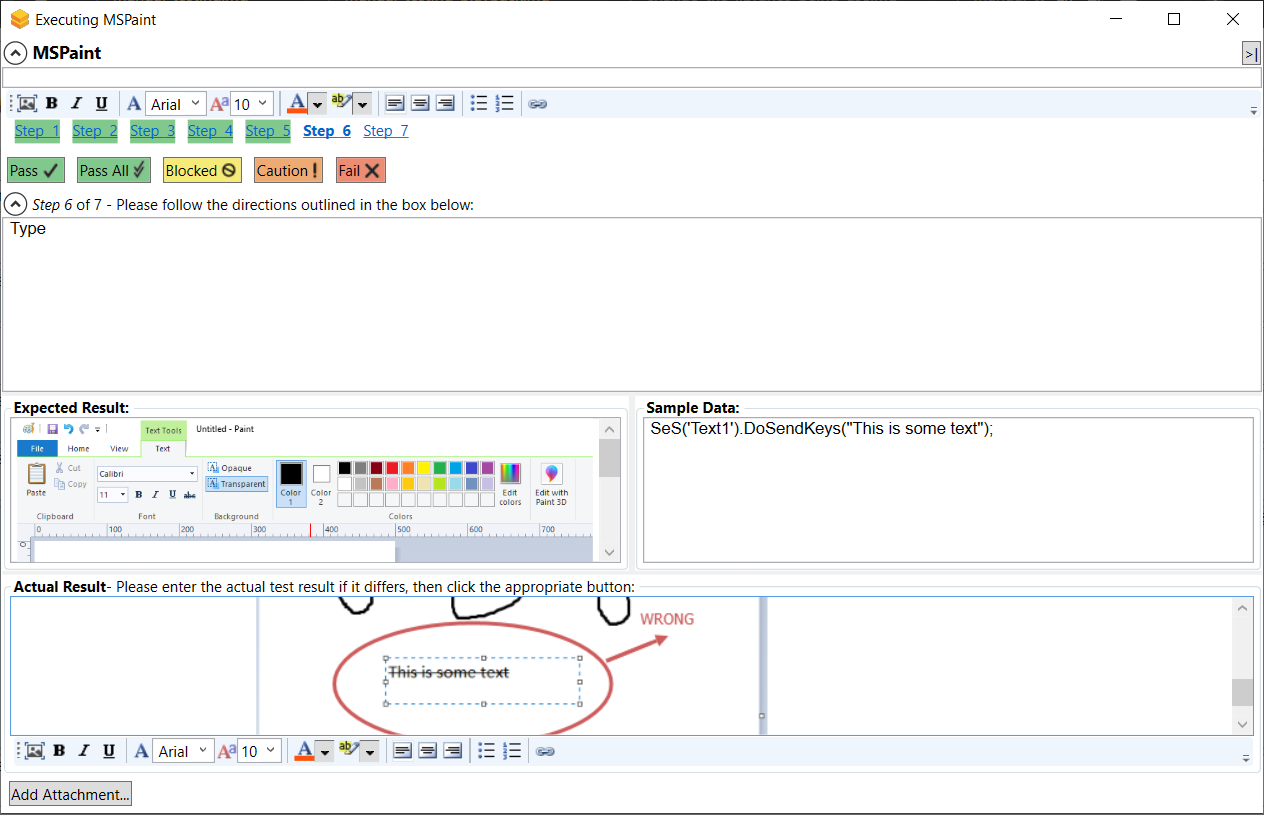
Once you get to Step 6, you will simulate that MS Paint failed to display the text correctly. In the Actual Result field, enter a message to that effect:
Next, you will attach a screenshot of what actually happened and log a test failure.
Step 3 - Capturing and Annotating a Screenshot
Click the Image icon in the rich text editor associated with the Actual Result text box. This will display the Drawing Tools screen, prompting you to draw a rectangle to select a portion of the current screen for capture:
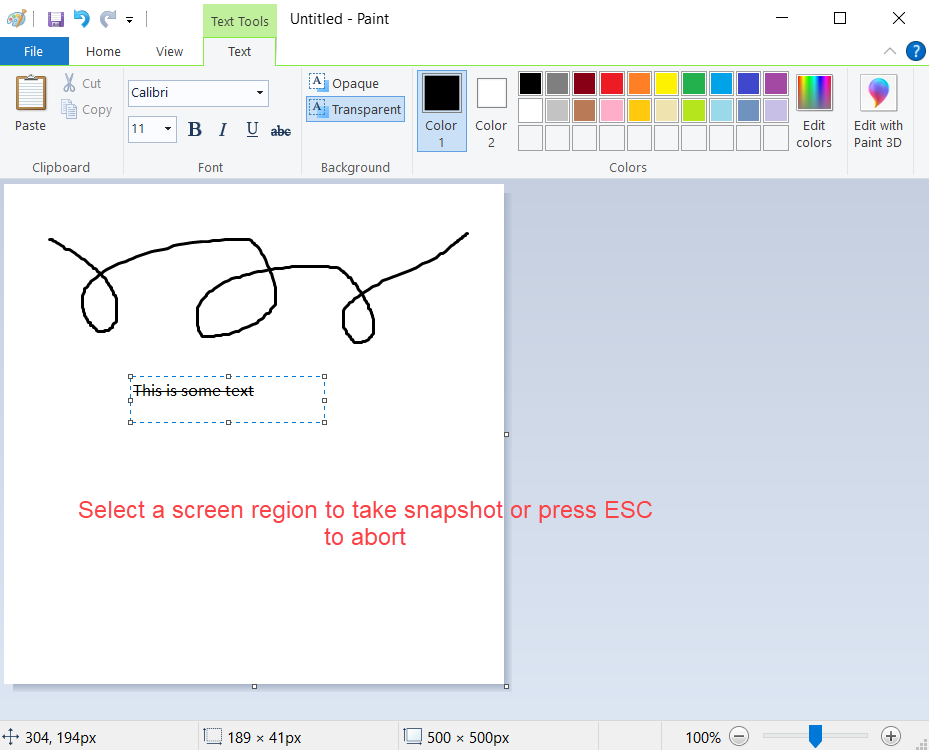
If the MS Paint application is not in the foreground, simply press Esc on your keyboard to abort, rearrange your windows, and then try again. Once you have selected the rectangle, the drawing tools will display the selected image in the image editor:
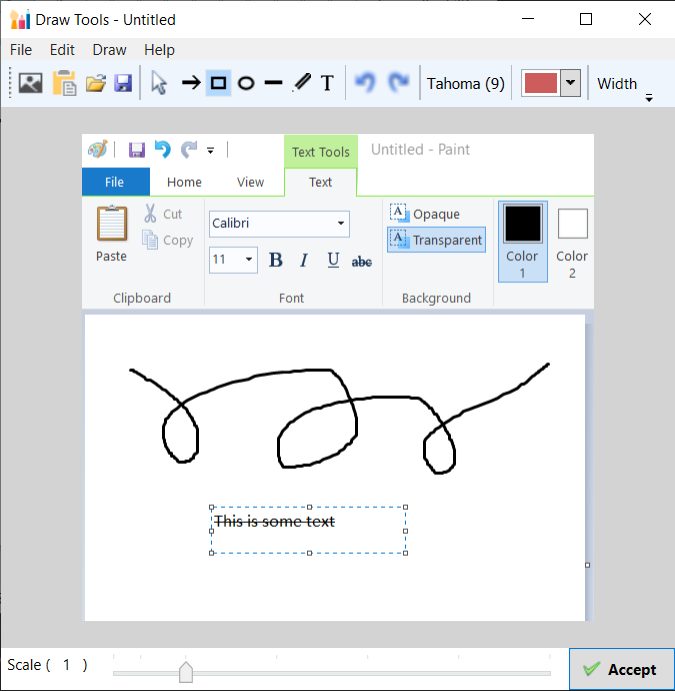
You can now use the annotation tools to add labels, text, and other items to explain the issue you found:
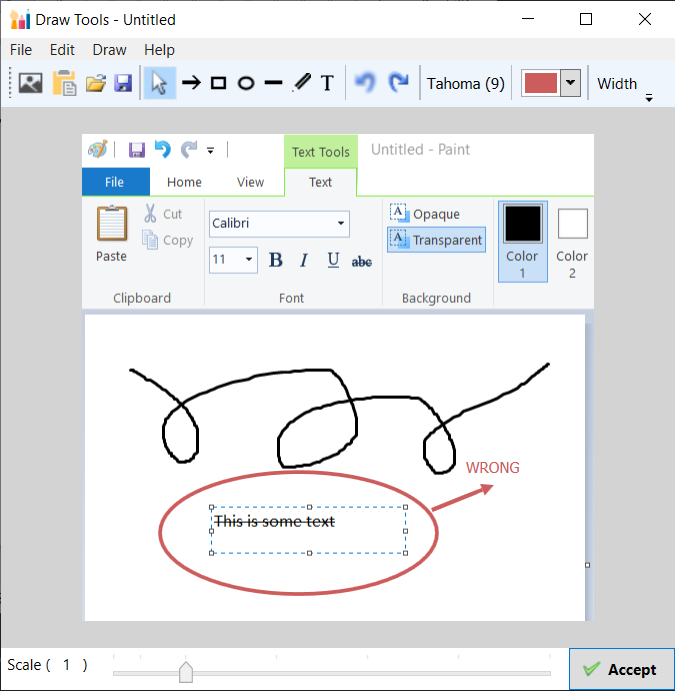
In the example above, a red ellipse, arrow, and text were added to highlight the issue observed in MS-Paint. Once you are satisfied with the image, click Accept, and the image will be included in the test's Actual Result:
Finally, Fail Step 6 and click the Finish button.
The results will be posted to Spira.
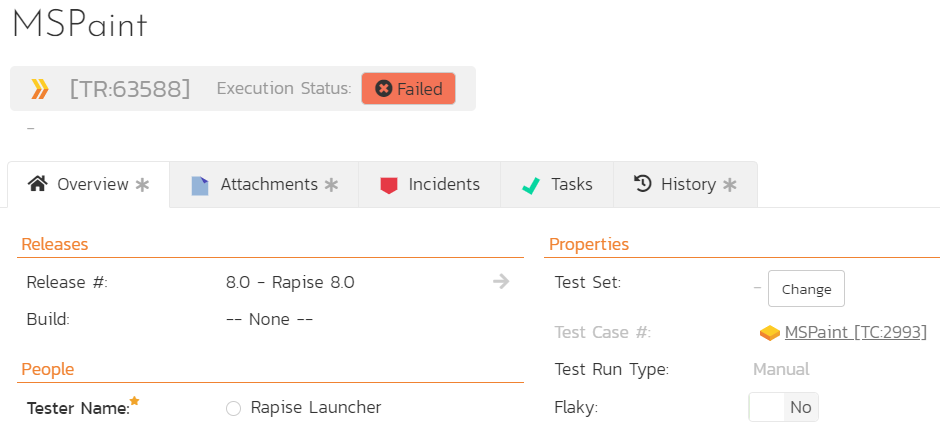
Step 4 - Viewing the Results
To view the results in Spira, click the View > View Manual Test in Spira menu. This will display the test case in Spira. Then click the Failed hyperlink in Spira, and the new test run details will be displayed:
If you scroll down, you can see the individual test steps that were executed, with the associated actual result (including the captured screenshot).
Congratulations! You have now successfully executed a manual test using Rapise.