Azure DevOps Integration v3
This section describes how to run Rapise tests in Azure DevOps pipelines or locally using Microsoft.TestPlatform.
If you are using SpiraTeam, you should check the section on the RapiseLauncher extension for Azure DevOps.
Azure DevOps
We assume that Rapise tests are stored in a Git repository and the Azure DevOps pipeline is connected to it. You can run Rapise tests both on self-hosted Windows Agents and Microsoft-hosted Windows Agents.
Rapise Test Adapter Task
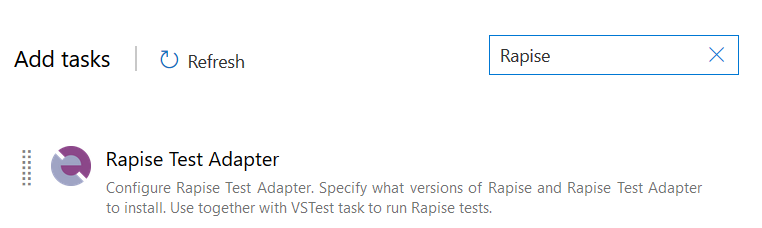
To run Rapise tests with a Visual Studio Test task, you need to install Rapise and Rapise Test Adapter for VSTest. The best way to do it is to use the Rapise Test Adapter Extension from Azure Marketplace. After this extension is installed, add the Rapise Test Adapter task to your pipeline.
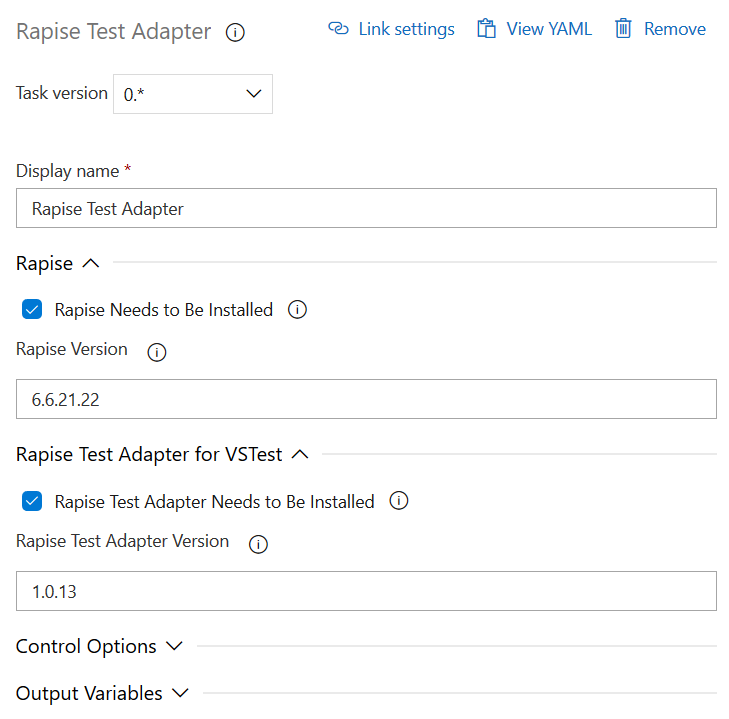
In the task settings, you can choose which versions of Rapise and Rapise Test Adapter to install.
Proceed to the next step.
Rapise Installation Task
Important
Skip this section if you are using Rapise Test Adapter Task
To run Rapise tests on a Microsoft-hosted Windows Agent, you need to configure the Rapise Installation task. If you are running on a self-hosted Windows Agent, you can install Rapise manually once and then use it in every pipeline run.
Download and place this PowerShell script in your Git repository:
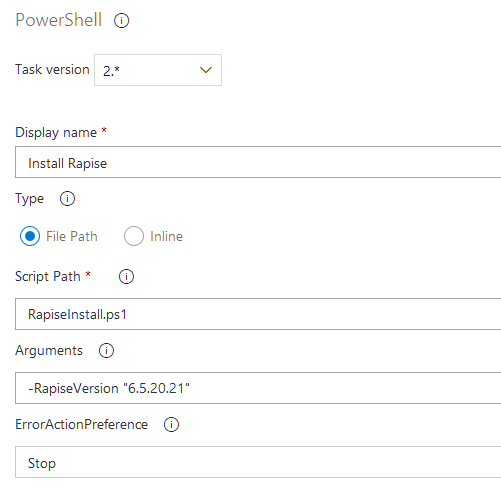
This script downloads and installs Rapise. It also installs the Rapise extension in the Chrome browser. In your pipeline, add a PowerShell task to execute this script. Pass the Rapise version to install as a parameter.
Classic UI
YAML
steps:
- task: PowerShell@2
displayName: 'Install Rapise'
inputs:
    targetType: filePath
    filePath: ./RapiseInstall.ps1
    arguments: '-RapiseVersion "6.5.20.21"'
Rapise.TestAdapter
Important
Skip this section if you are using Rapise Test Adapter Task
To run Rapise tests with a Visual Studio Test task, install the Rapise.TestAdapter NuGet package.
NuGet Tool Installer
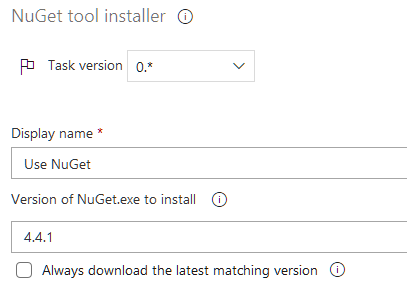
First, you need to install NuGet itself. Add the NuGet tool installer task.
Classic UI
YAML
steps:
- task: NuGetToolInstaller@0
displayName: 'Use NuGet'
inputs:
    versionSpec: 4.4.1
Rapise.TestAdapter NuGet Package
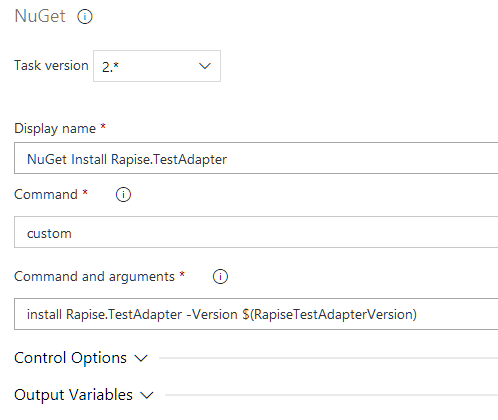
Then, add the NuGet task. Set command to custom and specify the command line:
install Rapise.TestAdapter -Version $(RapiseTestAdapterVersion)
Classic UI
YAML
steps:
- task: NuGetCommand@2
  displayName: 'NuGet Install Rapise.TestAdapter'
  inputs:
    command: custom
    arguments: 'install Rapise.TestAdapter -Version $(RapiseTestAdapterVersion)'
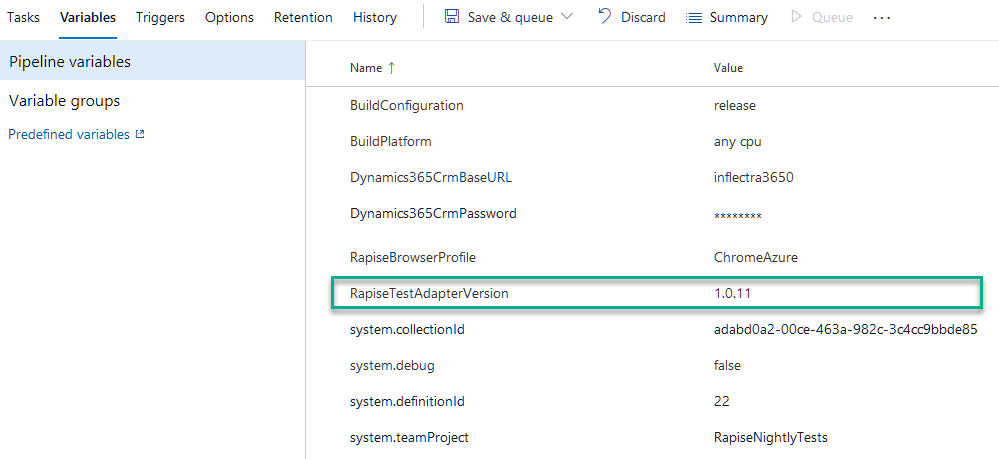
In the pipeline settings, set the RapiseTestAdapterVersion variable to the Rapise.TestAdapter version you want to install (e.g. 1.0.11).
The task will install Rapise.TestAdapter into
$(Build.Repository.LocalPath)\Rapise.TestAdapter.$(RapiseTestAdapterVersion)\lib\net472
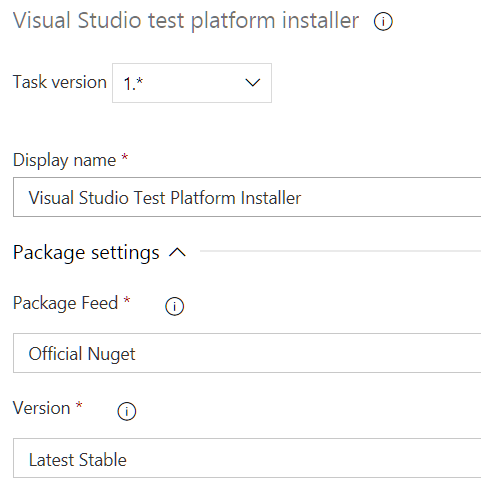
Visual Studio Test Platform Installer Task
If you plan to run tests on a Self-hosted Windows Agent that does not have Visual Studio installed, you need to add the Visual Studio Test Platform Installer task.
Classic UI
YAML
steps:
- task: VisualStudioTestPlatformInstaller@1
displayName: 'Visual Studio Test Platform Installer'
inputs:
    versionSelector: latestStable
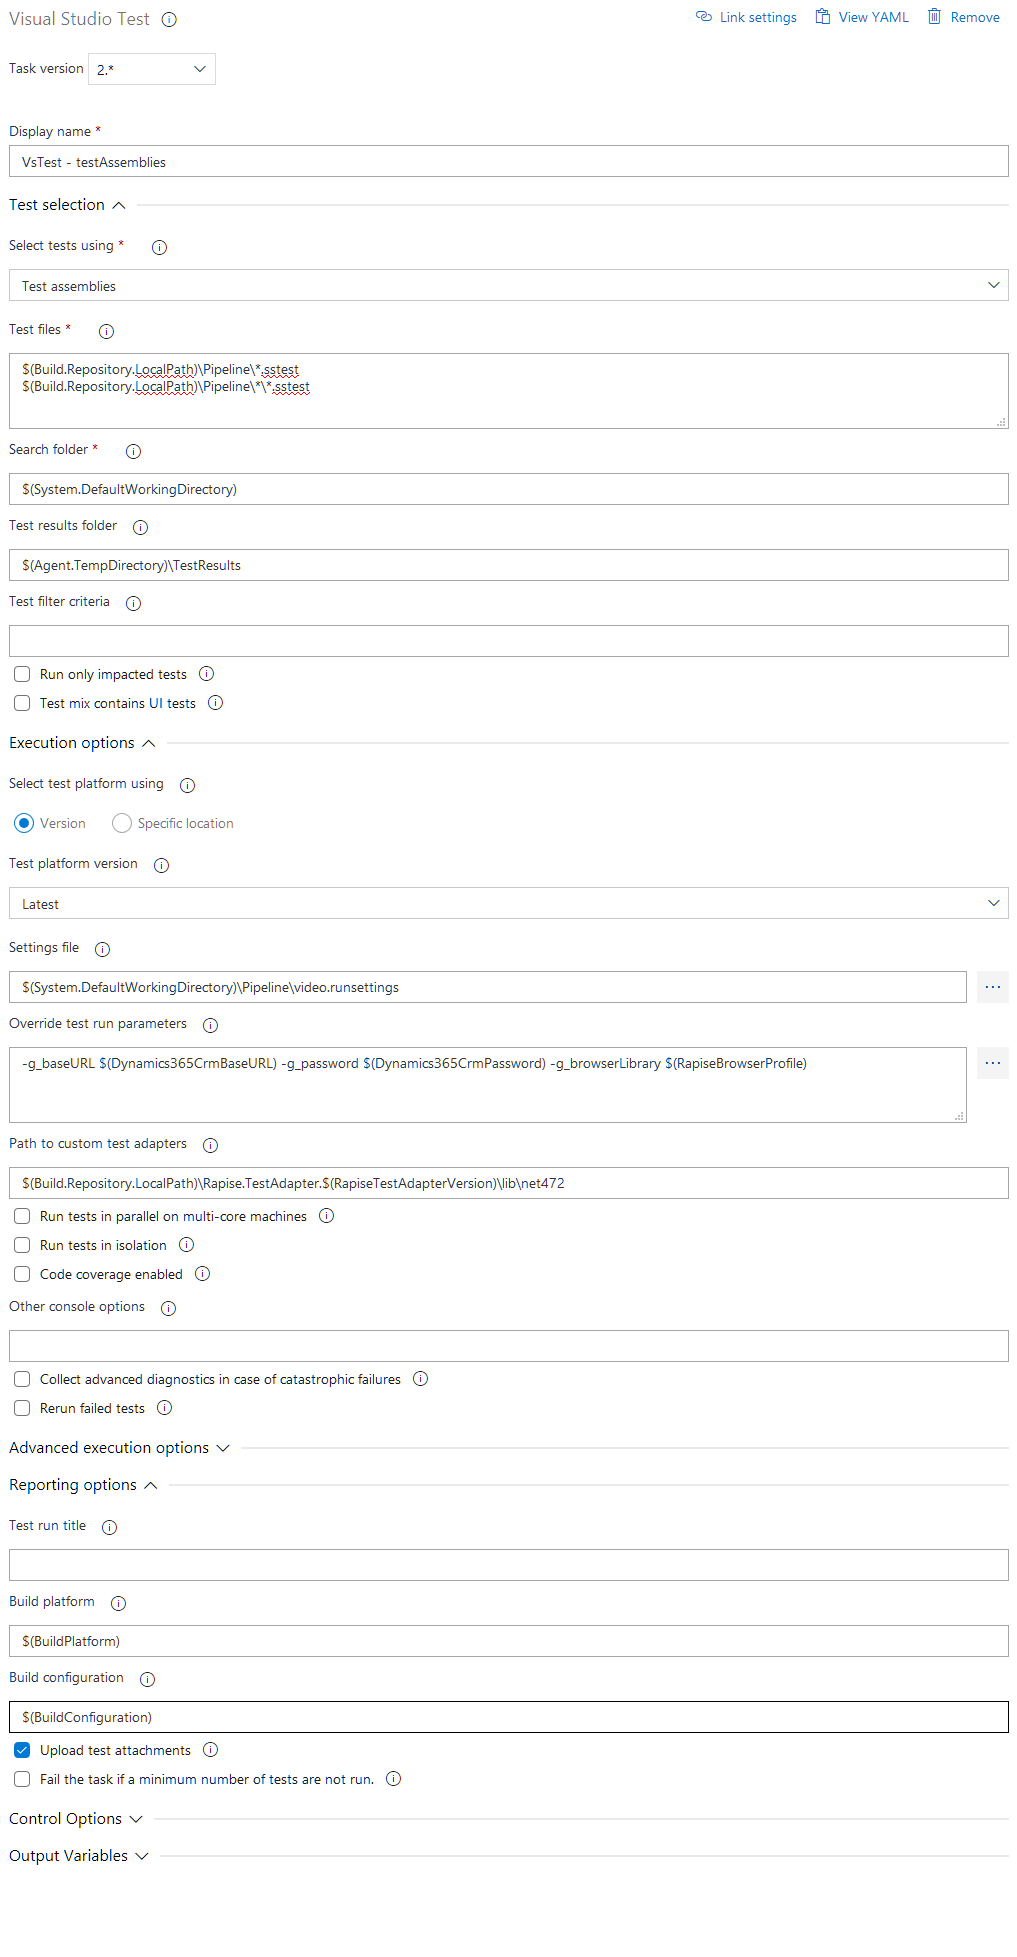
Visual Studio Test Task
To run tests, you need the Visual Studio Test task.
Classic UI
YAML
steps:
- task: VSTest@2
  displayName: 'VsTest - Run Rapise Tests'
  inputs:
    testAssemblyVer2: |
     $(Build.Repository.LocalPath)\Tests\*.sstest
     $(Build.Repository.LocalPath)\Tests\*\*.sstest
    runSettingsFile: '$(System.DefaultWorkingDirectory)\Pipeline\azure.runsettings'
    overrideTestrunParameters: '-g_baseURL $(Dynamics365CrmBaseURL) -g_password $(Dynamics365CrmPassword) -g_browserLibrary $(RapiseBrowserProfile)'
    pathtoCustomTestAdapters: '$(Build.Repository.LocalPath)\Rapise.TestAdapter.$(RapiseTestAdapterVersion)\lib\net472'
    platform: '$(BuildPlatform)'
    configuration: '$(BuildConfiguration)'
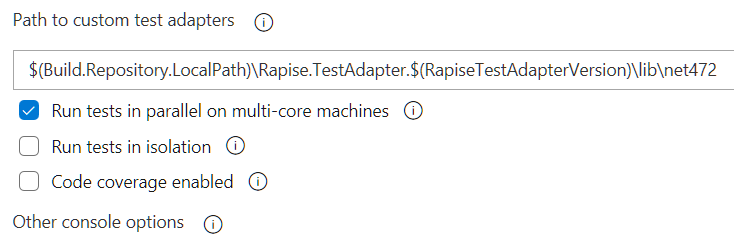
Make sure that the path to custom test adapters is set to
$(Build.Repository.LocalPath)\Rapise.TestAdapter.$(RapiseTestAdapterVersion)\lib\net472
Specify patterns to search for *.sstest files in the Test files section (testAssemblyVer2 in YAML).
If you added the Visual Studio Test Platform Installer task in the previous step, do not forget to set the Test platform version to Installed by Tools Installer (vsTestVersion: toolsInstaller in YAML).
Tip
Rapise.TestAdapter also supports filtering, parameters, and .runsettings files (specified via Visual Studio Test task options).
Test Filter Criteria
Rapise.TestAdapter supports filter criteria based on the FullyQualifiedName test property (which equals the *.sstest file name). To specify a filter, set testFiltercriteria in YAML or Test filter criteria in the Classic UI task editor.
Example:
FullyQualifiedName~LIS
Parameters
Parameters can be set via
- a .runsettings file,
- the
overrideTestrunParametersYAML option, or - the Override test run parameters field in the Classic UI task editor.
Note
Parameter names must be prefixed with g_.
Example:
-g_baseURL $(Dynamics365CrmBaseURL) -g_password $(Dynamics365CrmPassword) -g_browserLibrary $(RapiseBrowserProfile)
Note
$(name) - references a pipeline variable
.runsettings
A .runsettings file is used to pass parameters and to enable the video recorder.
Example:
<?xml version="1.0" encoding="utf-8"?>
<RunSettings>
  <!-- Parameters used by tests at runtime -->
  <TestRunParameters>
    <Parameter name="g_browserLibrary" value="Chrome" />
  </TestRunParameters>

  <DataCollectionRunSettings>
    <DataCollectors>
      <DataCollector uri="datacollector://microsoft/VideoRecorder/1.0" assemblyQualifiedName="Microsoft.VisualStudio.TestTools.DataCollection.VideoRecorder.VideoRecorderDataCollector, Microsoft.VisualStudio.TestTools.DataCollection.VideoRecorder, Version=15.0.0.0, Culture=neutral, PublicKeyToken=b03f5f7f11d50a3a" friendlyName="video" enabled="True">
        <Configuration>
          <MediaRecorder sendRecordedMediaForPassedTestCase="true"  xmlns="">
            <ScreenCaptureVideo bitRate="512" frameRate="2" quality="20" />
          </MediaRecorder>
        </Configuration>
      </DataCollector>
    </DataCollectors>
  </DataCollectionRunSettings>

</RunSettings>
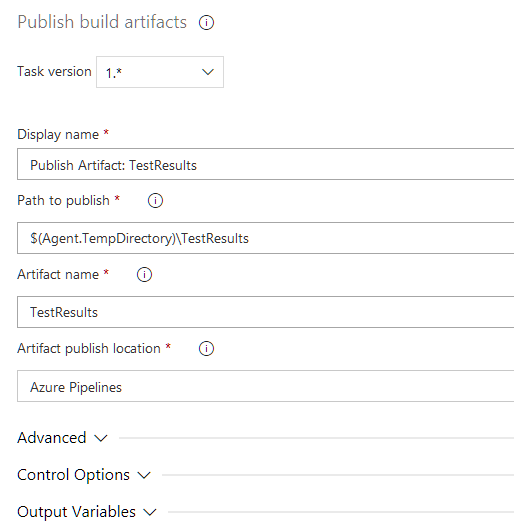
Publish Test Results
To publish test results (for later review and downloading), use the Publish Build Artifacts task. Execution results are copied to $(Agent.TempDirectory)\TestResults.
Classic UI
YAML
steps:
- task: PublishBuildArtifacts@1
  displayName: 'Publish Artifact: TestResults'
  inputs:
    PathtoPublish: '$(Agent.TempDirectory)\TestResults'
    ArtifactName: TestResults
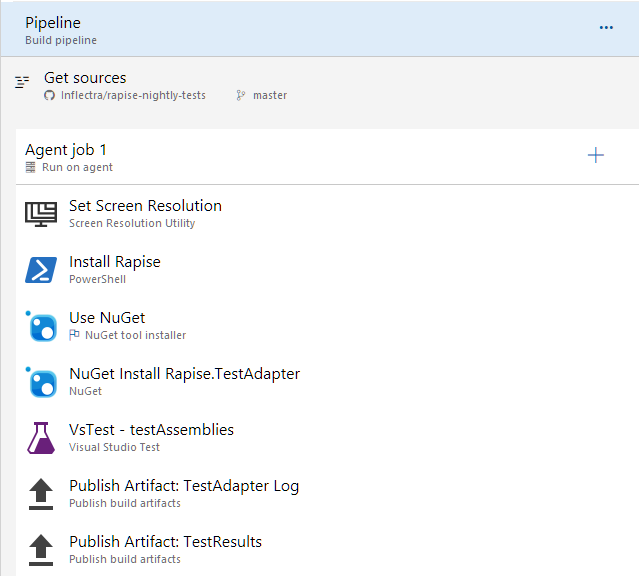
Pipeline Example
As a result of your pipeline configuration, you may end up with something like this:
Classic UI
Self-hosted Windows Agents
Azure DevOps can run tests in a hosted environment as well. If you plan to run tests inside your computer network, download and connect a Self-hosted Windows Agent.
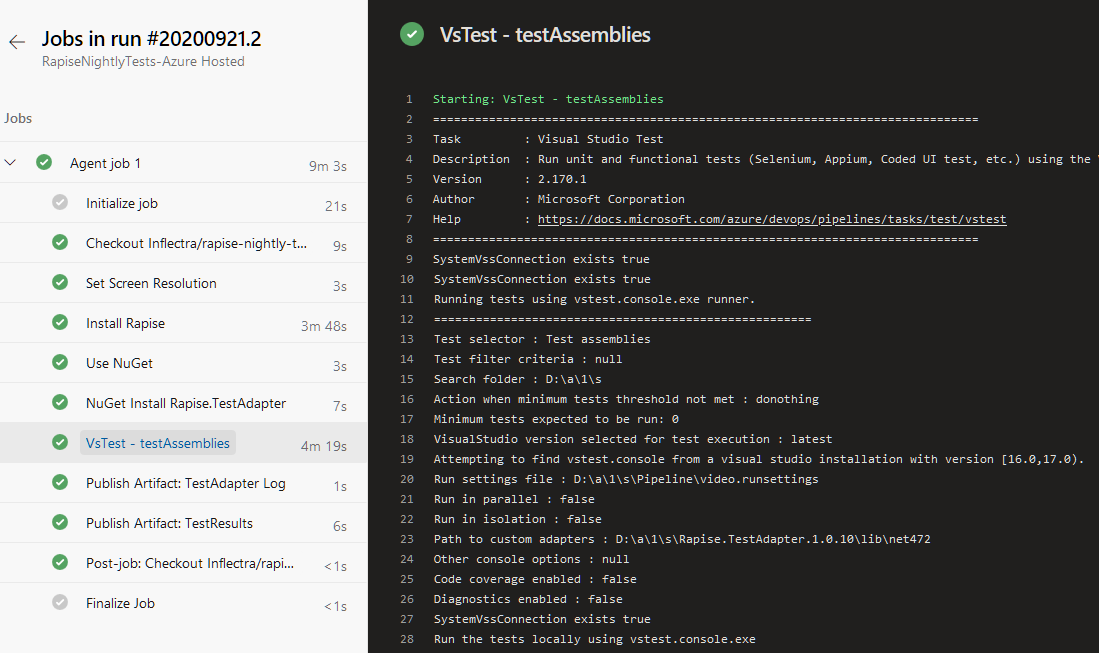
Logs and Reports
After every execution of the Visual Studio Test task, you will get logs and reports.
Log
Summary
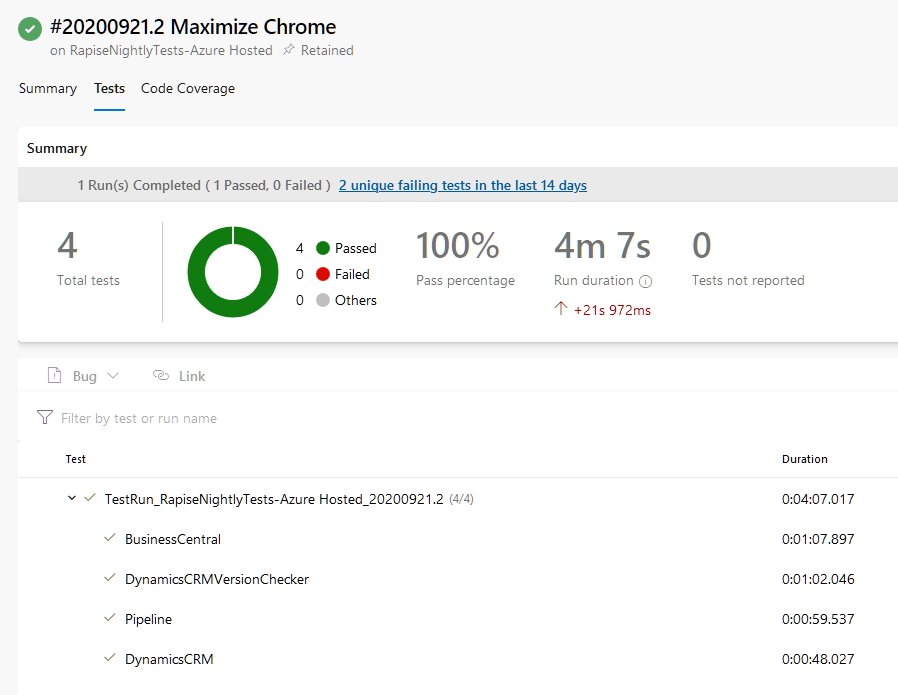
You can also see an individual test report (with attachments).
Attachments
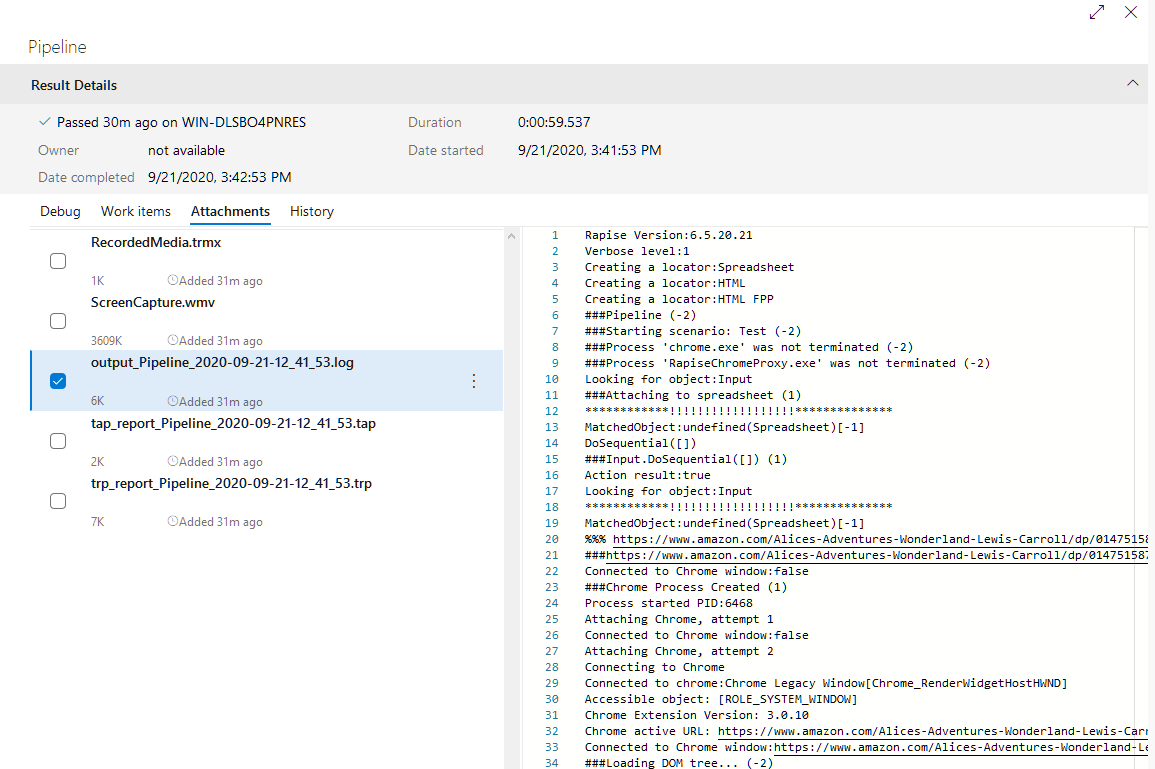
Attachments include reports in Test Anything Protocol (TAP) and Rapise (TRP) formats, output and error logs, and video recording (if enabled in .runsettings).
Run Tests with VSTest.Console.exe
It is also possible to run Rapise tests on a VM that has VSTest.Console.exe installed.
Setup Microsoft.TestPlatform on a VM
Let's assume that the working folder is C:\Tools.
- Download and install NuGet.
-
Install Microsoft.TestPlatform with a command
Findnuget install Microsoft.TestPlatformVSTest.Console.exeinC:\Tools\Microsoft.TestPlatform.16.7.1\tools\net451\Common7\IDE\Extensions\TestPlatform. Add this folder to the PATH environment variable. -
Install Rapise.TestAdapter
nuget install Rapise.TestAdapter -
You can now create a .cmd file and place it near your Rapise tests. For example,
vstest.console.exe /TestAdapterPath:C:\Tools\Rapise.TestAdapter.1.0.11\lib\net472 /Settings:local.runsettings /TestCaseFilter:FullyQualifiedName~LIS *\*.sstest
Parallel Execution
Note
If you are using SpiraTest, you may be interested in another way of parallel execution.
Two levels of parallelism are possible. They can be used independently or combined.
Run Tests in Parallel
Visual Studio Test Platform can run tests in parallel. Users of vstest.console.exe will recognize this as the /Parallel switch. It does so by launching a test host process on each available core and handing it tests to execute.
Here is how to set this switch in an Azure Pipeline (Visual Studio Test task):
Classic UI
YAML
steps:
- task: VSTest@2
displayName: 'VsTest - testAssemblies'
inputs:
    testAssemblyVer2: '*\*.sstest'
    overrideTestrunParameters: '-g_browserLibrary "$(RapiseBrowserProfile)"'
    pathtoCustomTestAdapters: '$(Build.Repository.LocalPath)\Rapise.TestAdapter.$(RapiseTestAdapterVersion)\lib\net472'
    runInParallel: true
    platform: '$(BuildPlatform)'
    configuration: '$(BuildConfiguration)'
This method of parallel execution is effective for running API tests and Web tests (provided that Selenium profiles are used).
Multi-Configuration Testing
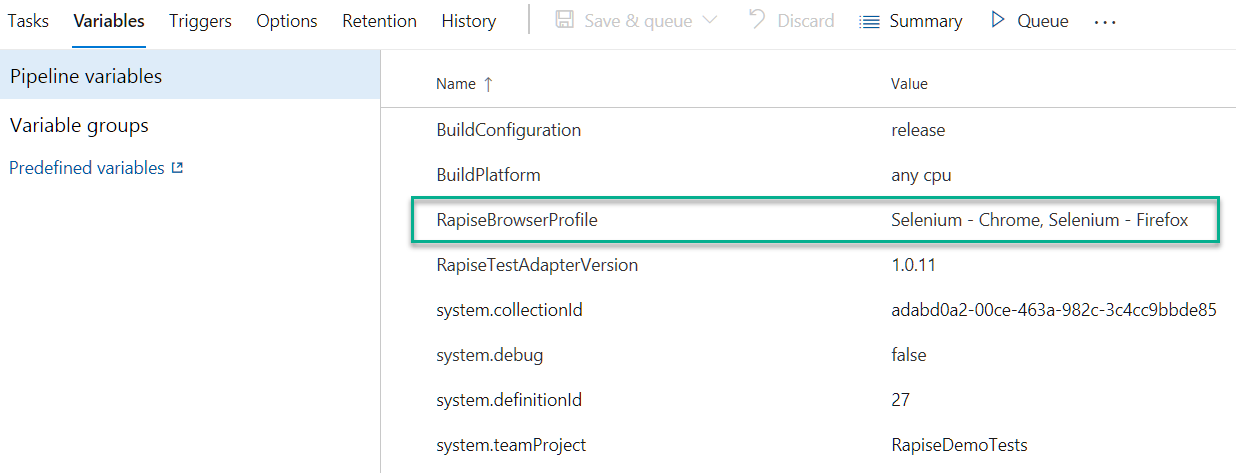
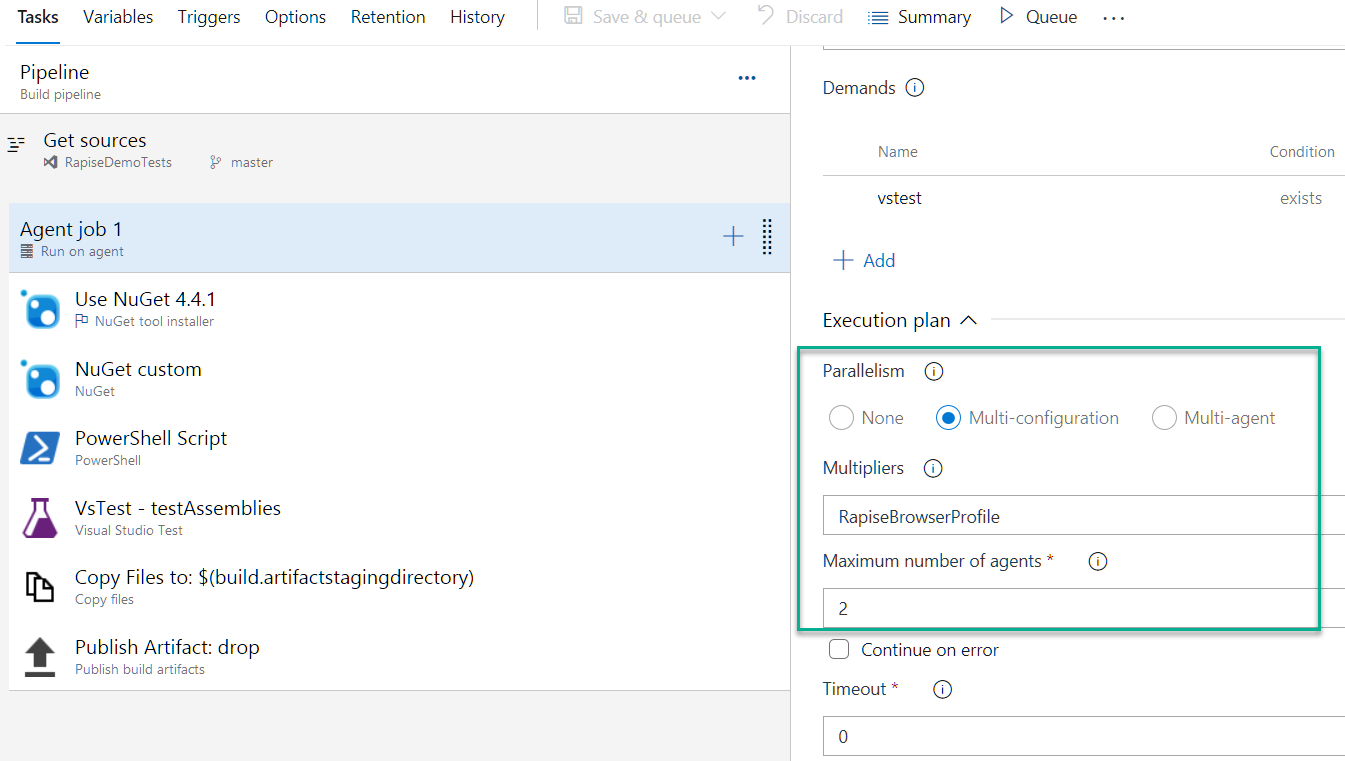
The Visual Studio Test task supports running tests in parallel across multiple agents (or machines). To run multiple jobs using the multi-configuration option, you identify variables named multipliers and specify a list of values for each multiplier. A separate job is run for each value combination. Define one or more variables on the Variables tab of the pipeline or in a variable group. Each variable, known in this context as a multiplier variable, must be defined as a comma-delimited list of the values you want to pass individually to the agents.
Let's assume we want to run the same set of tests on different browser versions. Here is the example.
Multiplier Configuration
Run Tests on Azure and Report to Spira
If you plan to use Azure VMs to run tests and want to see the results in Spira, check out the RapiseLauncher extension for Azure DevOps.