Manual Testing: Recording
Purpose
As described in the main Manual Testing topic, sometimes it is not possible to automate the testing of a specific application; however, Rapise is also a powerful manual test generation system that can help you create test cases 5x faster than simply creating test cases manually, step by step.
This section describes how you can automatically record a set of steps by simply using the application being tested. Unlike an automated test, however, Rapise stores a human-readable description of the actions performed, along with a screenshot, rather than actual computer code that can be played back.
Step 1 - Creating a New Test
To start manual testing, create your test as normal using the New Test dialog box. Once the test has been created, click Tools > Manual Steps. This will take you to the Manual Editor with the Manual Test Toolbar visible:

The test step list will initially be empty.
Step 2 - Recording Some Steps
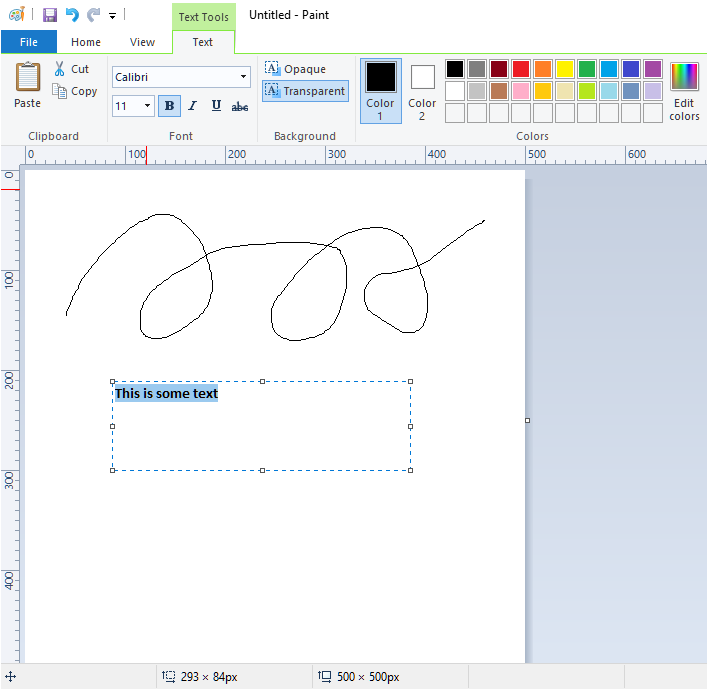
Now, open the application you want to record. In this example, we will be testing the built-in Microsoft Paint application. This is a good candidate for manual testing, as much of its functionality is difficult to test automatically due to its simple drawing canvas rather than discrete buttons and data elements.
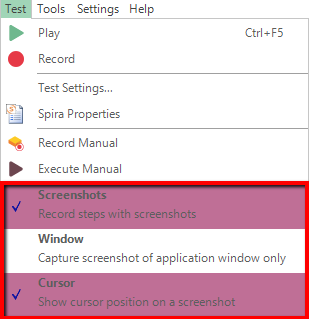
To ensure that screenshots are recorded while keeping their size reasonable, use the following recording options:
Now click the Record Manual button and choose MS-Paint from the list of running applications in the Select Application to Record dialog, then click 'Select' to begin recording.
As you interact with the application, the recording displays the captured steps and actions:
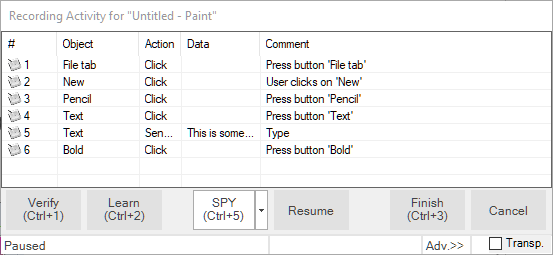
In this example, we created a new canvas, chose the Pencil tool, created a drawing using the pencil, entered some text, and then made it bold:
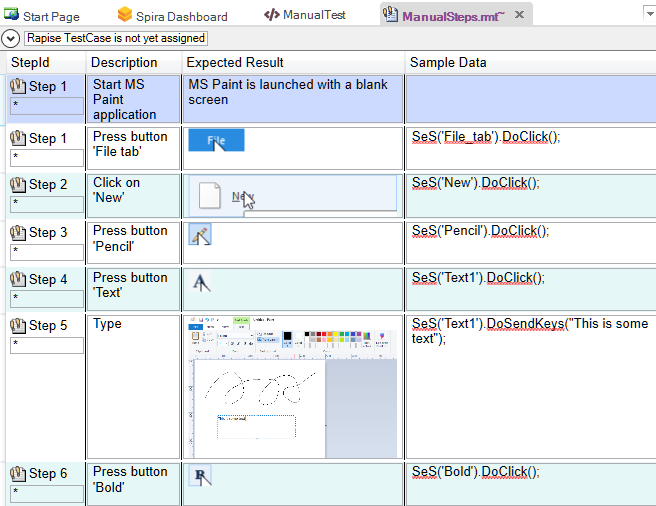
When you click Finish to complete the recording, Rapise displays the populated list of manual test steps with the embedded screen captures:
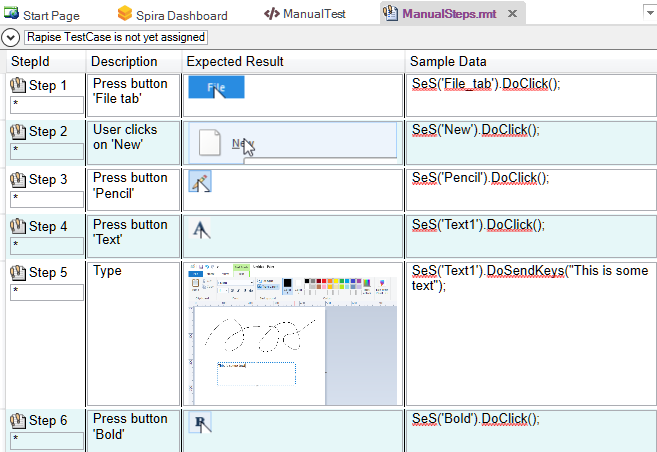
Notice that each recorded test step already has a Description and an Expected Result, along with a screenshot of the user's actions. In addition, the Sample Data contains the equivalent of Rapise automation code for reference. This can be useful later if you decide to automate this test.
Step 3 - Editing the Steps
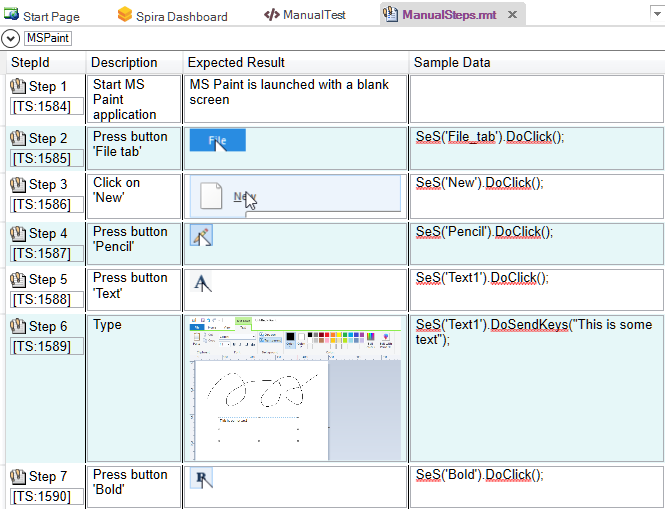
Typically, you may want to add additional steps (e.g., we added a step to describe the process of starting MS Paint), delete any duplicate or unnecessary steps, and reword them to make the most sense to the tester. In our example, we used the manual editing screen to update the steps as follows:
Click Save to ensure all updates are saved locally. Before you can execute these tests, you will need to save them to Spira, our web-based test management system.
Step 4 - Saving to Spira
Click the Save to Spira option. You will be asked to confirm the creation of the document folder in Spira where the test files will be stored:
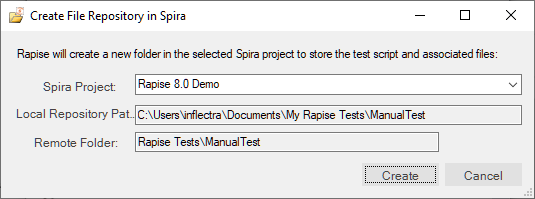
Click Create, then click OK in the Synchronize Files dialog. The manual test will be saved to Spira. This process adds unique Spira test step IDs to each step. They are displayed in the format [TS:xxx]. This special token, [TS:xxx], can be used in Tester.Assert commands to relate specific verification points with test steps during automated testing.
Now that the test has been saved in Spira, you can click the View Manual Test in Spira toolbar button to view the test steps in Spira.

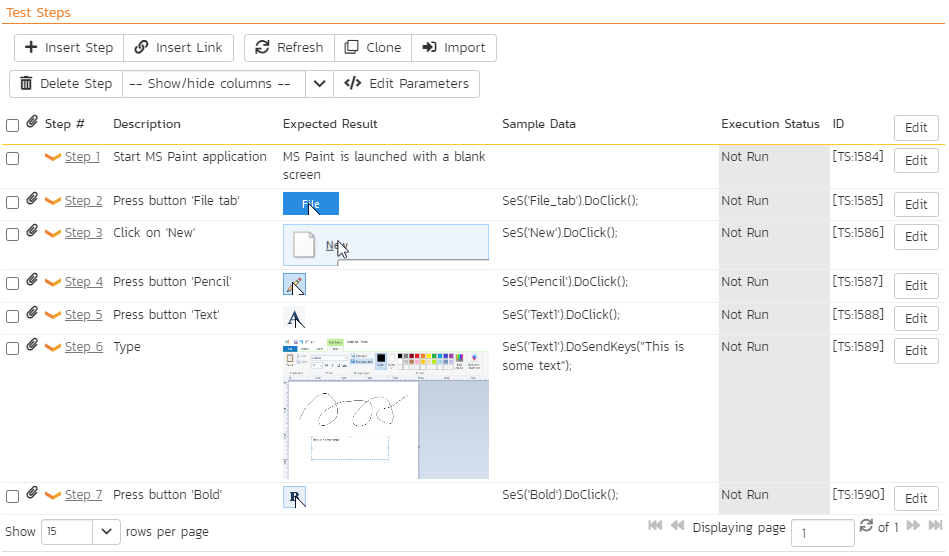
Now this test case is ready for manual playback.