Visual Studio and Azure DevOps Integration v1
Tip
This documentation section is deprecated. A new method for integrating Rapise with Azure DevOps is available. Please refer to Azure DevOps Integration v3.
This section describes how to execute Rapise tests using the Microsoft Test Framework.
Tests can be executed using:
Unit Test Mapping
Rapise integrates with Visual Studio at the Unit Test level.
Create a Unit Test project in Visual Studio, add a unit test and a test method. In the References section, add the following DLL:
1 | |
In a test method, specify the absolute path to a Rapise test and pass the TestContext parameter to the Rapise.TestExecute function:
namespace UnitTestProject1
{
    [TestClass]
    public class UnitTest1
    {
        public TestContext TestContext { get; set; }

        [TestMethod, TestCategory("browser")]
        public void CreateNewBook()
        {
            Rapise.TestExecute(@"c:\\Demo\\Framework\\CreateNewBook\\CreateNewBook.sstest", TestContext);
        }
    }
}
Parameters
To pass parameters to a Rapise test, create a .runsettings file. Each parameter whose name starts with g_ will be passed to Rapise via the command line.
Here is an example of selecting a browser for cross-browser test execution:
<?xml version="1.0" encoding="utf-8"?>
<RunSettings>
  <!-- Parameters used by tests at runtime -->
  <TestRunParameters>
    <Parameter name="g_browserLibrary" value="Selenium - Chrome" />
  </TestRunParameters>
</RunSettings>
Visual Studio Test Explorer
Once Rapise tests are mapped to unit tests, you can use Visual Studio Test Explorer to run tests and analyze results.
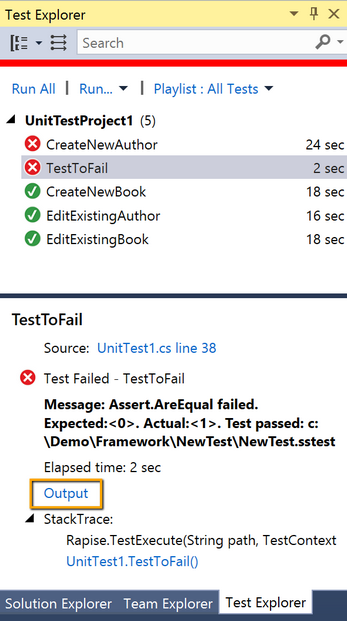
Click the Output link (highlighted) to view test run results.
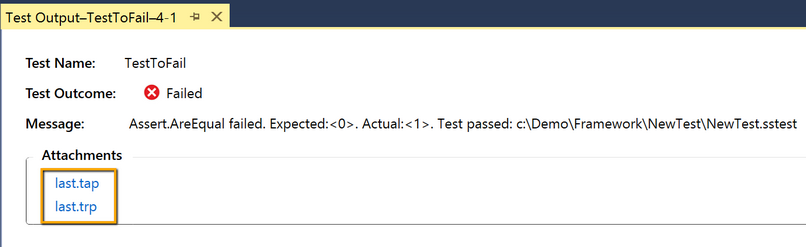
last.tapis a test report in Test Anything Protocol format (human-readable). Click to open it in any text viewer/editor.last.trpis a test report in Rapise format. Click to open it in Rapise.
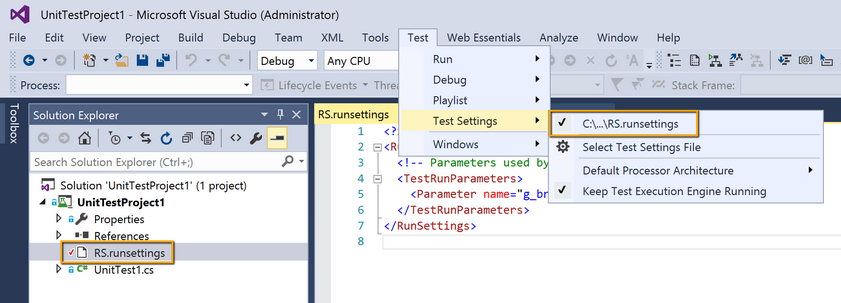
You can apply a .runsettings file for execution:
VSTS / TFS
In Visual Studio Team Services, you can run unit tests after a build is completed.
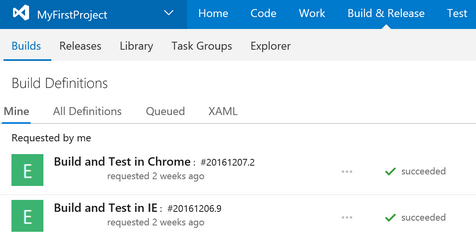
The build definition contains predefined steps:

Here is an example configuration for the Test Assemblies step:
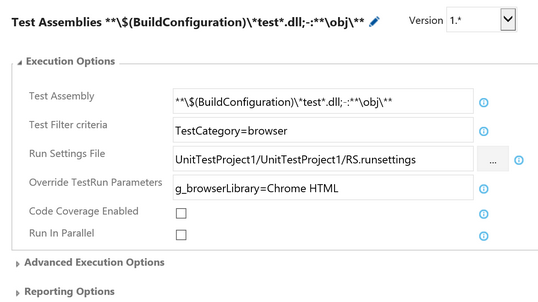
- The Test Assembly field contains a wildcard mask that selects unit tests only from matching DLLs.
- In the Test Filter criteria, you can select tests by
TestCategory, which is an attribute of a Test Method:
[TestMethod, TestCategory("browser")]
public void CreateNewBook()
{
    Rapise.TestExecute(@"c:\\Demo\\Framework\\CreateNewBook\\CreateNewBook.sstest", TestContext);
}
- The Run Settings File is a link to the .runsettings file.
- In Override TestRun Parameters, you can override the values of the parameters in the
.runsettingsfile.
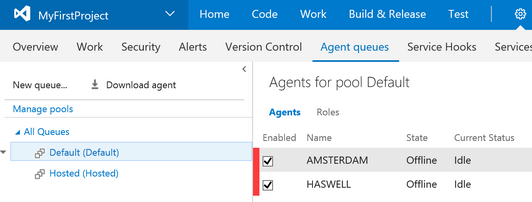
Windows Agent for Test Execution
VSTS can run tests in a hosted environment, but this environment does not include Rapise. Therefore, you will most likely need to run tests within your computer network. Download and connect a Windows Agent. You can configure several agent pools to run tests in different environments:
Azure DevOps
On September 10, 2018, Microsoft renamed Visual Studio Team Services (VSTS) to Azure DevOps Services.
Executing Rapise tests in Azure DevOps is slightly different from former versions of VSTS, although most concepts remain the same.
Trigger execution using a Visual Studio Test task. You can add this to a build or release pipeline.
Here is an example of a build pipeline configuration.
# .NET Desktop
# Build and run tests for .NET Desktop or Windows classic desktop solutions.
# Add steps that publish symbols, save build artifacts, and more:
# https://docs.microsoft.com/azure/devops/pipelines/apps/windows/dot-net

# Running on a self-hosted agent

trigger:
- master

pool:
  name: 'default'

variables:
  solution: '**/*.sln'
  buildPlatform: 'Any CPU'
  buildConfiguration: 'Release'

steps:
- task: NuGetToolInstaller@0

- task: NuGetCommand@2
  inputs:
    restoreSolution: '$(solution)'

- task: VSBuild@1
  inputs:
    solution: '$(solution)'
    platform: '$(buildPlatform)'
    configuration: '$(buildConfiguration)'

- task: VSTest@2
  inputs:
    testSelector: 'testAssemblies'
    testAssemblyVer2: |
     **\$(BuildConfiguration)\*test*.dll
     !**\*Microsoft.VisualStudio.TestPlatform*
     !**\obj\**
    searchFolder: '$(System.DefaultWorkingDirectory)'
    testFiltercriteria: 'TestCategory=browser'
    runSettingsFile: 'UnitTestProject1\UnitTestProject1\RS.runsettings'
While configuring the pipeline, you can add a Visual Studio Test task using the left panel.
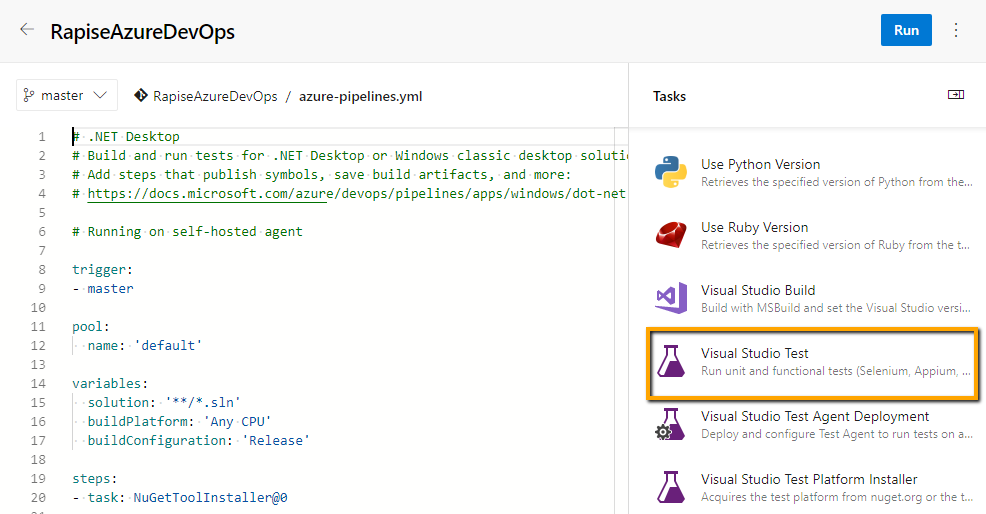
Here is an example configuration for the Visual Studio Test task:
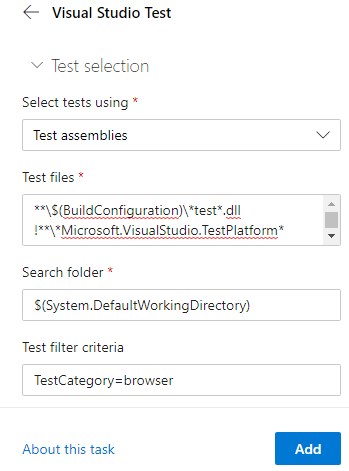
- The Test files field contains a wildcard mask that selects unit tests only from matching DLLs.
- In the Test filter criteria, you can select tests by
TestCategory, which is an attribute of a Test Method:
[TestMethod, TestCategory("browser")]
public void CreateNewBook()
{
    Rapise.TestExecute(@"c:\\Demo\\Framework\\CreateNewBook\\CreateNewBook.sstest", TestContext);
}
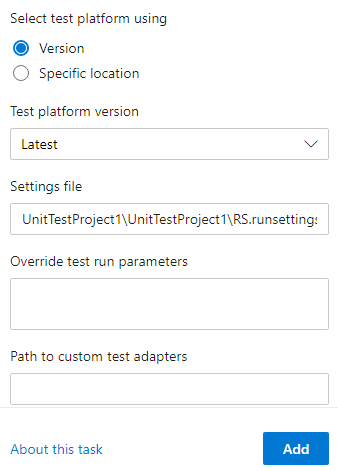
- The Settings File is a link to the .runsettings file.
Self-hosted Windows Agents
Azure DevOps can run tests in a hosted environment, but this environment does not include Rapise. Therefore, you will most likely need to run tests within your computer network. Download and connect a Self-hosted Windows Agent.
Reference the agent pool with self-hosted agents in your azure-pipelines.yml using the pool tag.
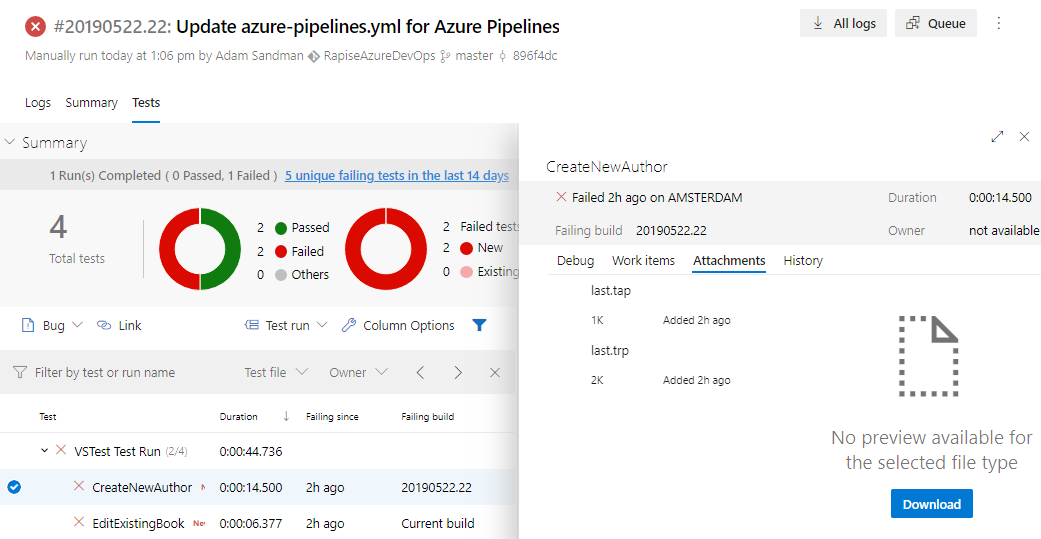
Logs and Reports
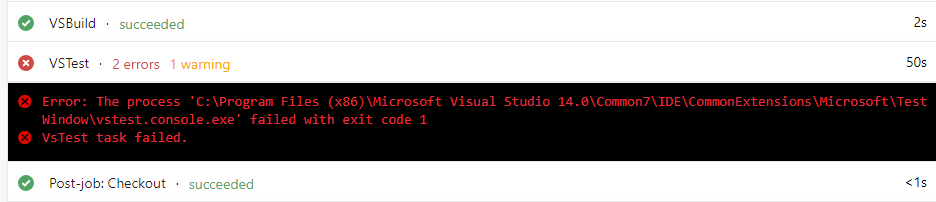
After each execution of the Visual Studio Test task, you will receive logs and reports.
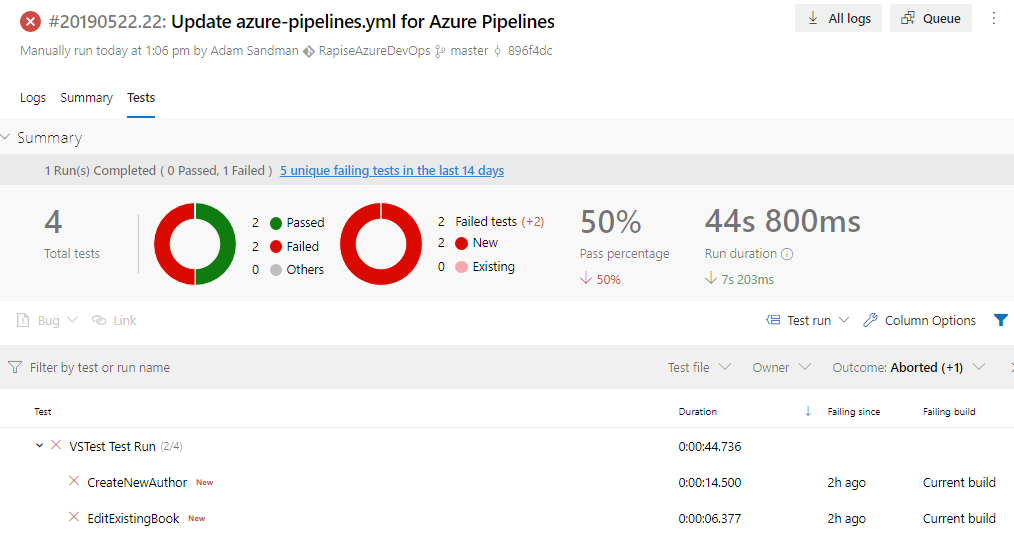
You can also view an individual report for a failed test.