Test Framework Parameters
Important
This section applies to the new Framework mode introduced in Rapise 8.0.
In test automation projects, it is often necessary to parameterize test cases for various purposes. For instance, this could involve specifying different URLs for running tests in different environments (development, staging, production), or providing user credentials for logging into the system. Additionally, there might be a need to quickly modify playback speed, error handling, and screenshot settings for multiple test cases. In Rapise 8.0's Framework mode, managing parameters is made simple and convenient. This allows for easy creation and management of parameters, including the ability to run the same test case with different input data, such as filling a form with various values to create multiple records in a system database.
In the upcoming sections, you will gain valuable insights into the process of defining parameters and configurations, as well as how they are applied in test cases and test sets. If you're looking for concrete examples of parameter creation and usage, we highly recommend exploring this knowledge base article.
Framework Parameters
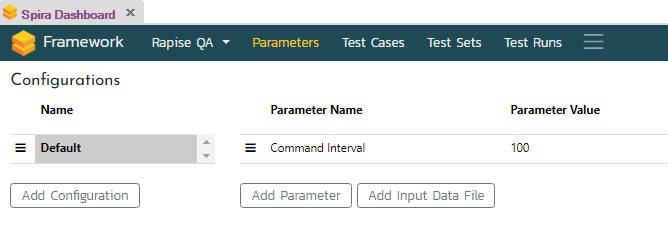
To manage framework-level parameters and configurations, navigate to the Spira Dashboard from the main menu (View > Spira Dashboard). Then, switch to the Parameters page in the dashboard.
Note
If you do not see the Parameters link, then the test opened in Rapise is not a framework.
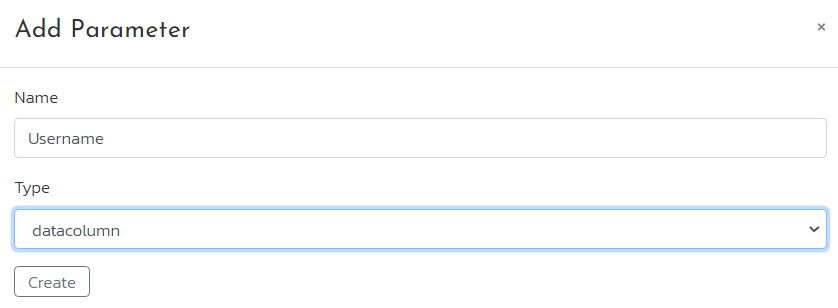
The Parameters page contains two tables: one for parameters and the other for configurations. To add a parameter, click the Add Parameter button. This will bring up the Add Parameter dialog.
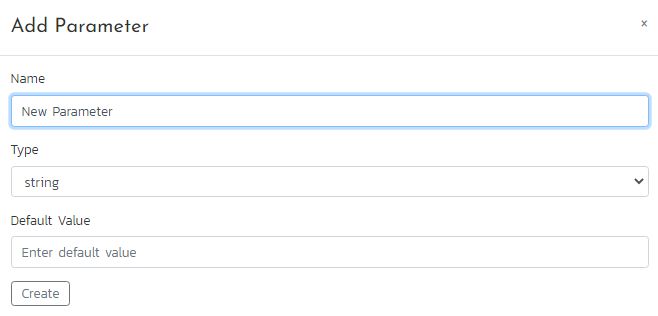
Specify the parameter name, type, and default value, then click Create.
Supported Parameter Types
- boolean - A simple boolean value, true or false.
- number - A numeric value, integer or float.
- string - A string value, e.g., a URL or user name.
- password - A masked (******) password string.
- select - A dropdown with predefined choices.
- browser - The list of global and local browser profiles.
- mobile - The list of global and local mobile profiles.
- datacolumn - A parameter to bind to a column in the data file.
Single Select Parameter
If the parameter type is set to select, you must define the list of options. For this purpose, use the pop-up menu.
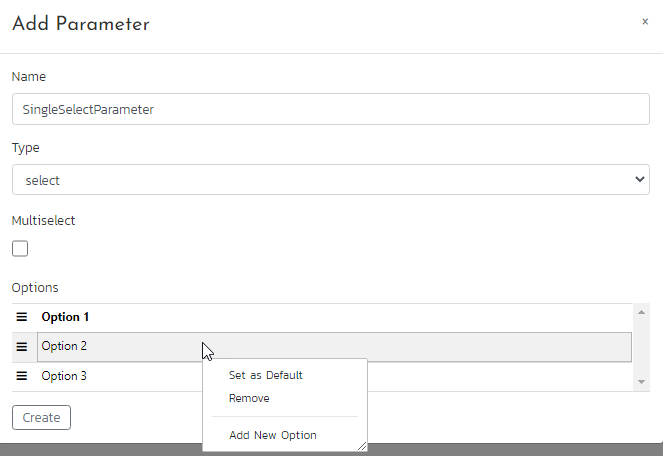
You can add a new option, remove an existing one, or set a specific option as the default. Also, using the hamburger icon, you can reorder the options.
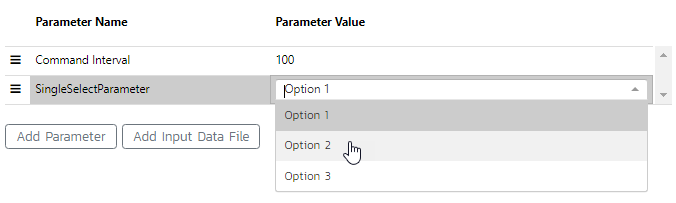
To select a Single Select Parameter, double-click it in the Parameters table and then click the desired option.
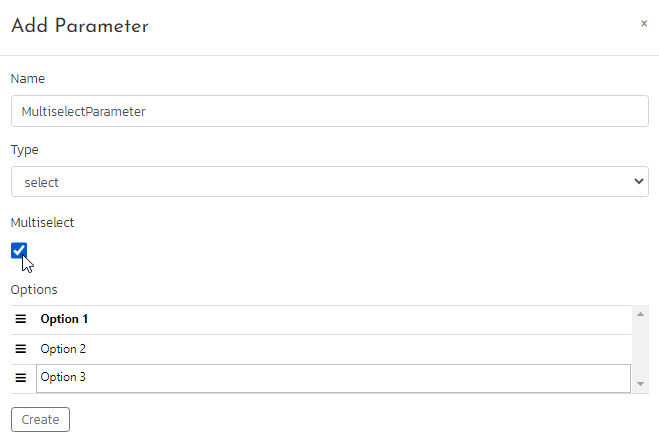
Multiselect Parameter
To convert a Single Select Parameter into a Multi Select Parameter, simply select the Multiselect checkbox.
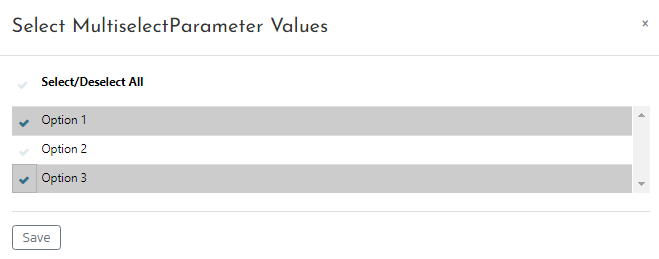
To select options for a Multiselect Parameter, double-click it in the Parameters table, choose the options you need, and then click the Save button.
Important
The purpose of multiselect parameters is to run test cases included in a test set with all possible parameter value combinations. For example, if you have just one multiselect parameter MP1 with selected options MP1O1 and MP1O2, RapiseLauncher will then run a test set twice: the first time with MP1=MP1O1 and the second time with MP1=MP1O2. Another example: If you have MP1 with selected values [MP1O1, MP1O2] and MP2 with selected values [MP2O1, MP2O2], RapiseLauncher will then run a test set 4 times with the following combinations:
MP1=MP1O1, MP2=MP1O1
MP1=MP1O1, MP2=MP1O2
MP1=MP1O2, MP2=MP1O1
MP1=MP1O2, MP2=MP1O2
Browser Parameter
A Browser parameter is a select or multiselect parameter with automatically calculated values. Its values are the names of global and local browser profiles. If a framework contains a web test case or module, a Browser parameter is added automatically once you record anything into the web test.
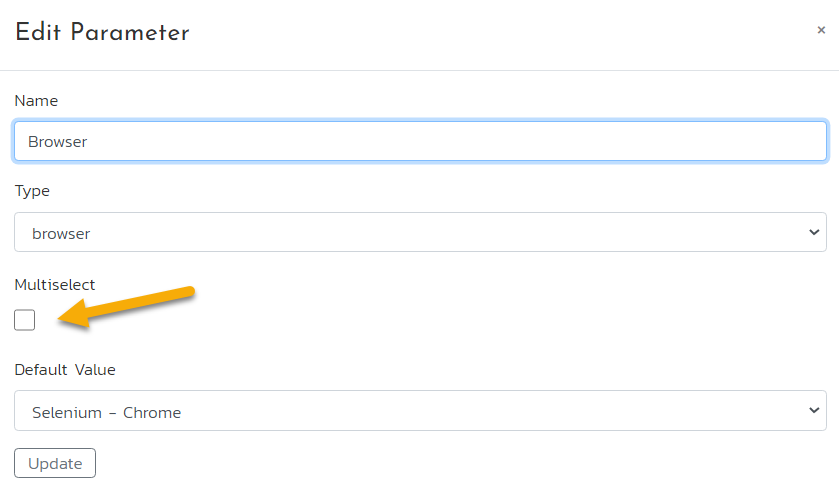
To convert a Browser parameter to a multiselect parameter, right-click it and choose Edit Parameter.... Select the Multiselect checkbox and click the Update button.
Explore this knowledge base article to learn how to run a test set on multiple browsers.
Mobile Parameter
A Mobile parameter is a select or multiselect parameter with automatically calculated values. Its values are the names of global and local mobile profiles. If a framework contains a mobile test case or module, a Mobile parameter is added automatically once you record anything into the mobile test.
To convert a Mobile parameter to a multiselect parameter, right-click it and choose Edit Parameter.... Select the Multiselect checkbox and click the Update button.
Datacolumn Parameter
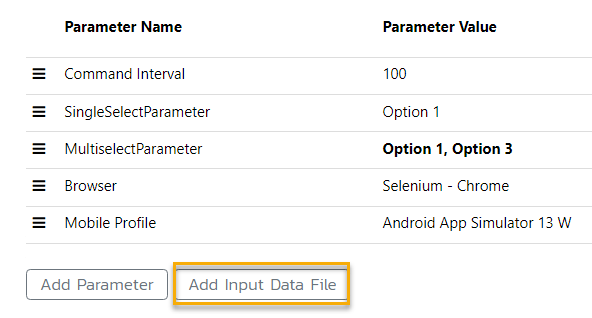
To define a datacolumn parameter, you need to have a data file. To add one, click the Add Input Data File button under the Parameters table.
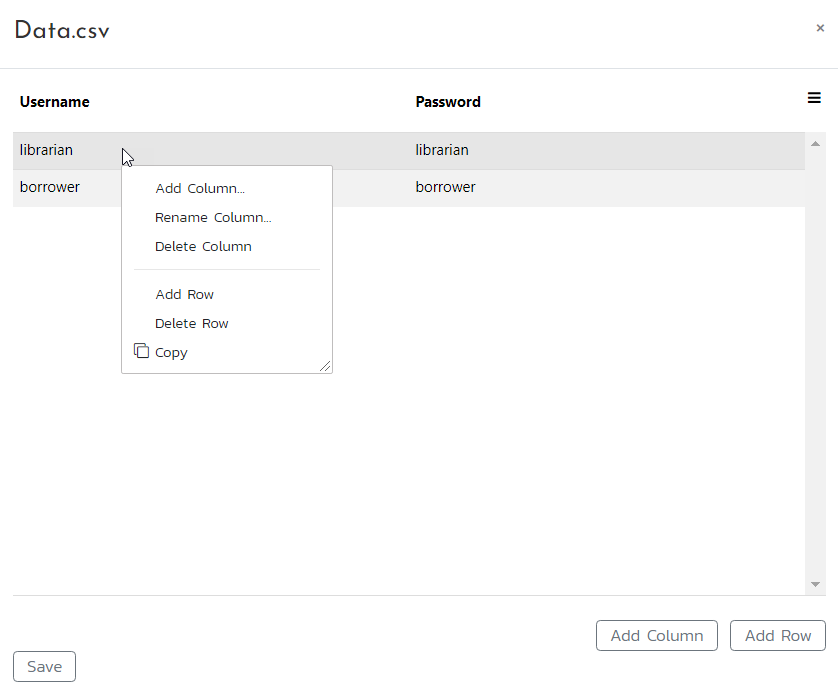
A Data.csv file will be added to the Lib\LibFramework folder of your framework. You can right-click it to edit.
In the CSV editor, you can add and remove columns, as well as data rows.
Let's create a datacolumn parameter named Username.
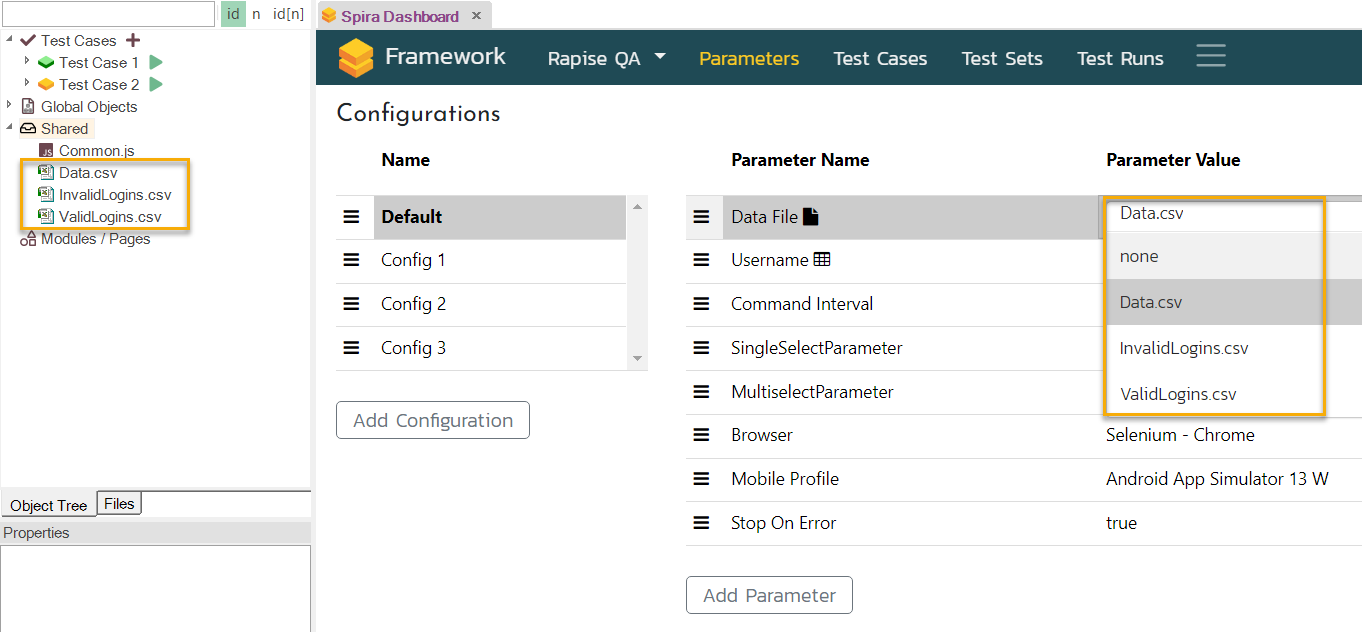
Double-click its value to choose from the data file column names.

When a datacolumn parameter is bound to a column in a data file, the initial data values are displayed on the right-hand side.

Data File Parameter
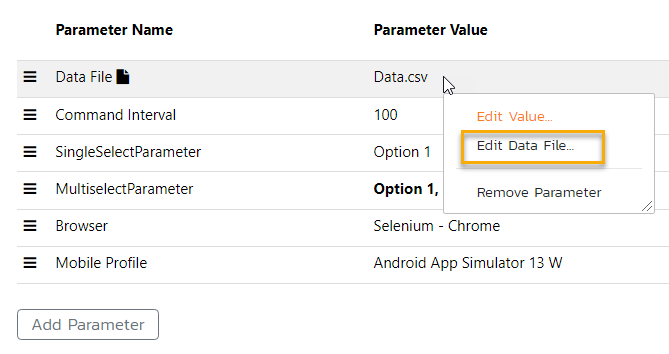
A framework can have only one Data File parameter. You can add it by clicking the Add Input Data File button under the Parameters table. If it is not needed, you can remove it by right-clicking on the Data File parameter and selecting the Remove Parameter option from the menu. When you add a Data File parameter, a Data.csv file is automatically generated in the Shared folder of the framework, and you can manually create additional data files in this folder as needed. To select the desired data file, double-click on the Data File parameter, and a dropdown menu will appear with all available data file names.
The purpose of the Data File parameter is to instruct RapiseLauncher to execute a test set multiple times—once for each data row in the selected data file. For instance, if there are two data rows in the data file, the test set will be executed twice.
Important
It's important to note that the Data File parameter can be combined with other parameters, such as multiselect and datacolumn parameters, to allow for more complex test configurations.
Consider the following example. Suppose we have a data file with columns C1 and C2, consisting of two data rows.
C1      C2
------------
v11     v12
v21     v22
Additionally, we have two datacolumn parameters, DC1 and DC2, which are linked to columns C1 and C2, respectively. We also have two multiselect parameters, MP1 with selected values [MP1O1, MP1O2] and MP2 with selected values [MP2O1, MP2O2]. If our test set is configured accordingly, RapiseLauncher will execute it 8 times with the following parameter values:
1 2 3 4 5 6 7 8 | |
To explore a practical application of multiselect and datacolumn parameters, please refer to this knowledge base article for a real-life example.
Builtin Parameters
Additionally, Rapise offers a collection of predefined parameters that can be added to the Parameters table. To access this feature, click the Play button in the toolbar, and then select the Parameters button in the Choose Test Case dialog.
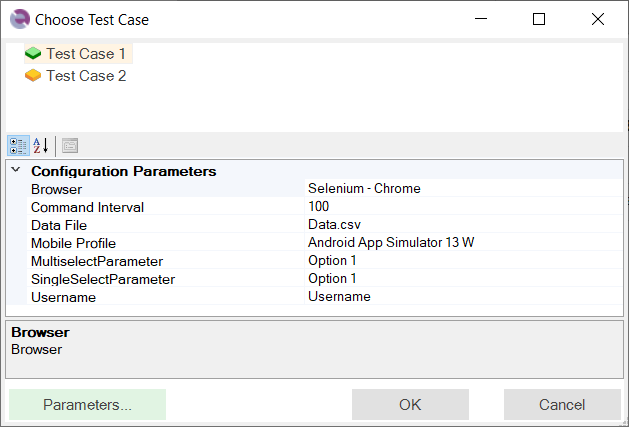
This action will bring up the Choose Parameters dialog.
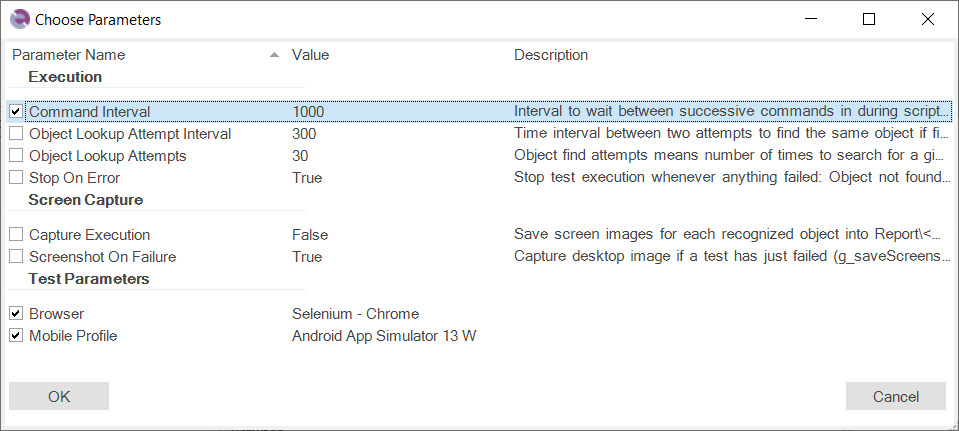
In the Choose Parameters dialog, you can select the checkboxes corresponding to the parameters you wish to include in the Parameters table. If you do not require certain parameters, simply uncheck their respective checkboxes to remove them from the table.
Configurations
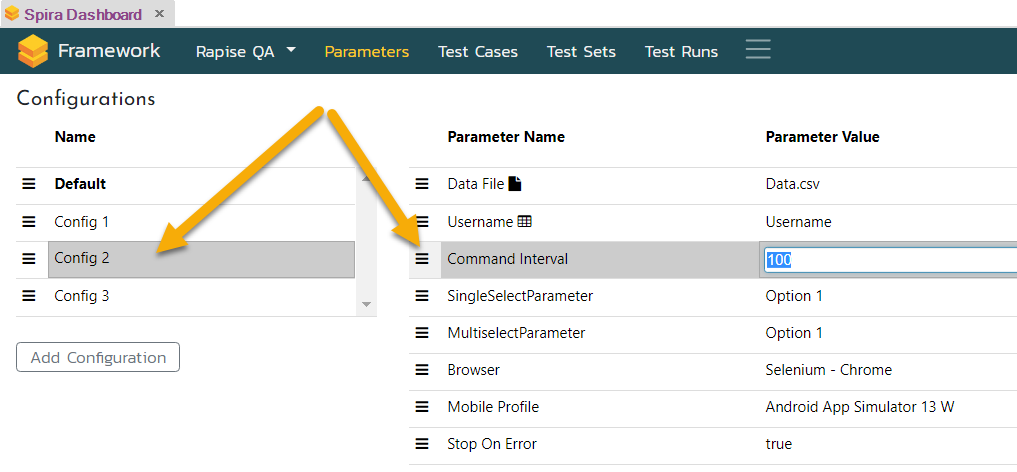
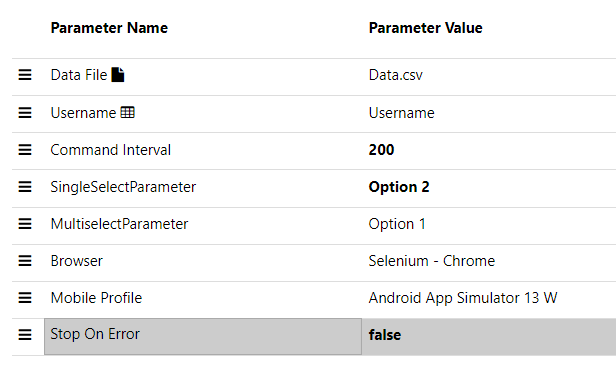
You have the flexibility to define multiple configurations within a framework. Each configuration represents a specific combination of parameter values. When you modify a parameter value in the Parameters table, it affects the currently selected configuration.
For example, the screenshot shows changing the Command Interval parameter value for the Config 2 configuration.
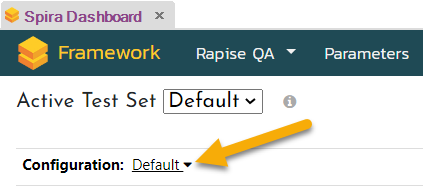
These configurations can be assigned to a test set on the Framework page of the dashboard.
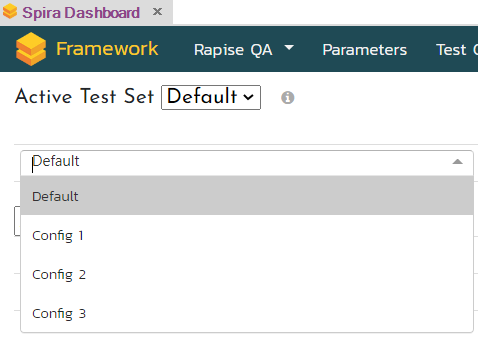
During the execution of a test set using RapiseLauncher, all test cases within that set inherit the parameter values defined in the assigned configuration. In cases where a parameter value is not explicitly assigned within a configuration, the default value is used during test set execution.
To easily identify parameter values that differ from the default, they are displayed in bold. This visual cue helps you quickly recognize any deviations from the default values.
To explore practical scenarios that involve configurations, refer to this knowledge base article.
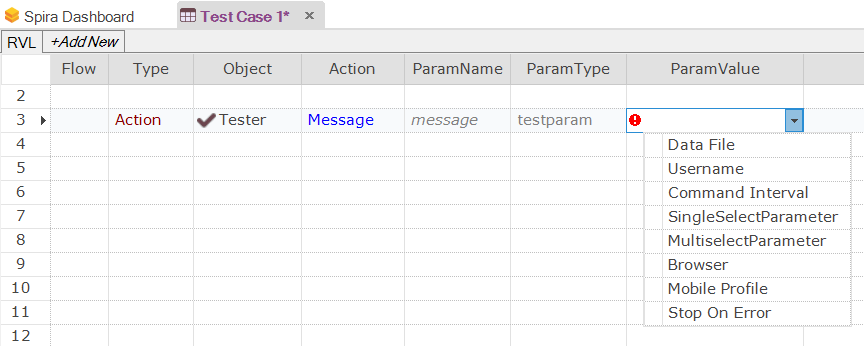
Reading Parameter Values
In RVL, simply set ParamType to testparam and select a framework parameter from the dropdown.
In JavaScript, use Tester.GetParam. Keep in mind that parameter names are case-sensitive.
    var username = Tester.GetParam("Username");
    Tester.Message(username);
See Also
- Defining Test Case Parameters
- Passing Parameters
- Passing Parameters for Test Run
- Passing Parameters Between Tests