Tutorial: Windows Testing (RVL)
This section outlines how to use Rapise for testing a simple Windows Desktop Application Under Test (AUT). This version of the tutorial uses the Rapise Visual Language (RVL) scriptless mode. If you're interested in the JavaScript version, we have a separate tutorial.
Please run the application. You will find it in the samples directory where you installed Rapise. By default, it is typically located at:
1 | |
You will see the following:
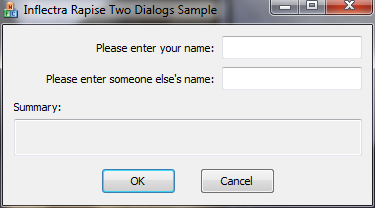
Please run the application a few times and observe its behavior.
- If you click the
OKbutton with the first edit box empty, the application will display an error and return to the dialog box. - If you enter text in the first edit box but not the second, you will be shown a single line of text in a read-only edit box.
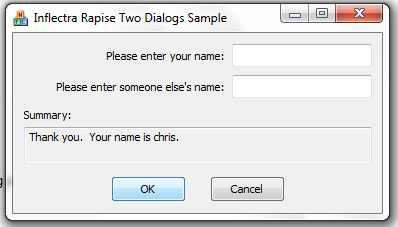
- If you enter text in the second edit box as well as the first, clicking OK will display two lines of summary information in the read-only edit box.
An adequate testing strategy for this very simple application could include:
- Enter data into the first text box but not the second, and verify that the summary information is correct.
- Click the OK button with no data in either text box, and verify that a message box is displayed.
- Verify that the edit box input fields are cleared if the success "Thank You" message is displayed (while the summary information remains unchanged).
If at this point you do not understand what the application is supposed to do, or the application is not behaving as described here, please contact Support and clarify the situation before proceeding.
Now, let's use Rapise to implement the first of these tests.
Step 1. Run the Application
Run the TwoDialogs application and leave it in its default state. Once executed, the TwoDialogs.exe application will be displayed on the screen:
Step 2. Start Rapise
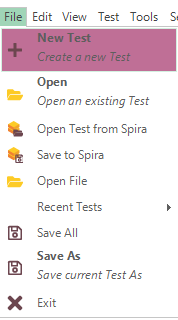
Start Rapise and resize the window to a convenient size. Click the File menu (top left). Choose the first option, "New Test."
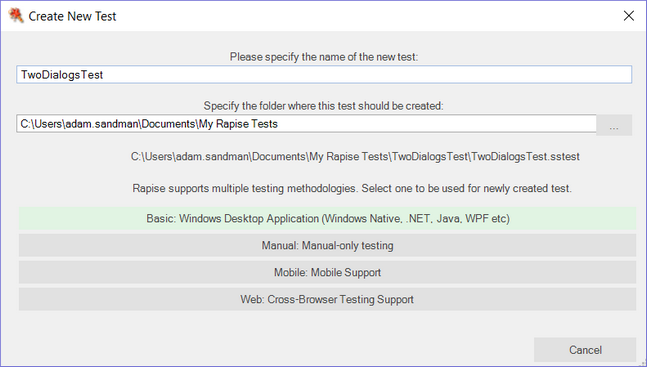
Step 3. Create New Test
Navigate to the desired path using the ... button on the Create New Test dialog. Enter a name for the new test script (e.g., "TwoDialogsTest"). Select the Basic: Windows Desktop Application methodology. This methodology should always be used for testing Windows desktop applications:
The following dialog will be displayed:
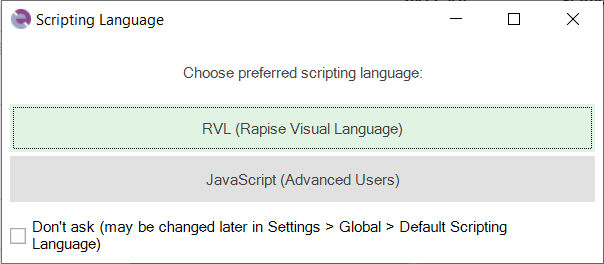
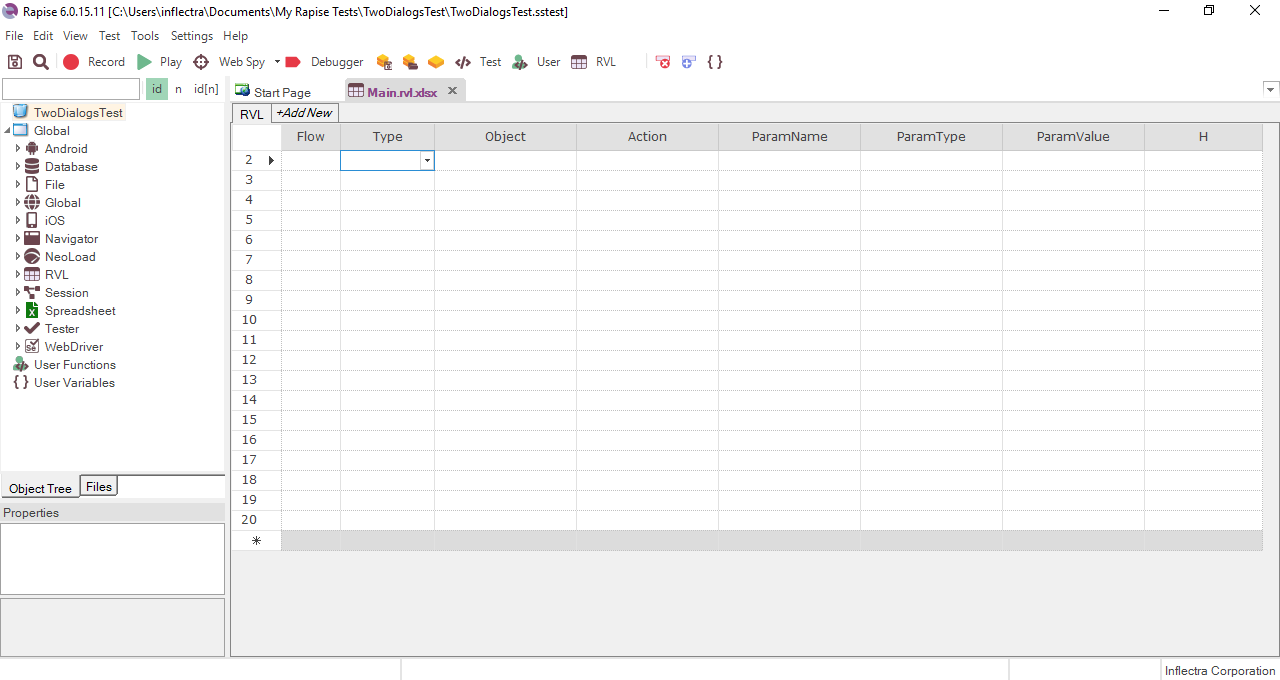
Click the RVL (Rapise Visual Language) button. You will now see the following:
Step 4. Start Recording
Click the "Record" button on the toolbar. It has an icon like this:

You will see an application selection dialog like the following.
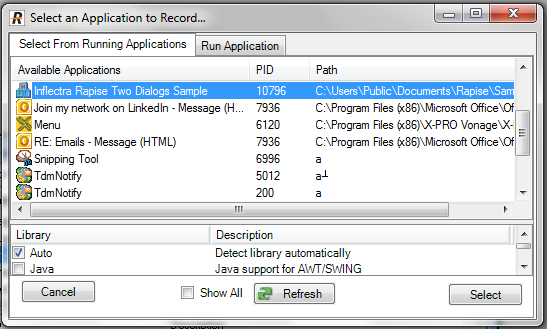
- Select the "Inflectra Rapise Two Dialogs Sample" entry.
- Leave the library selection as "Auto."
- Click the "Select" button at the bottom right.
Step 5. Recording Guidelines
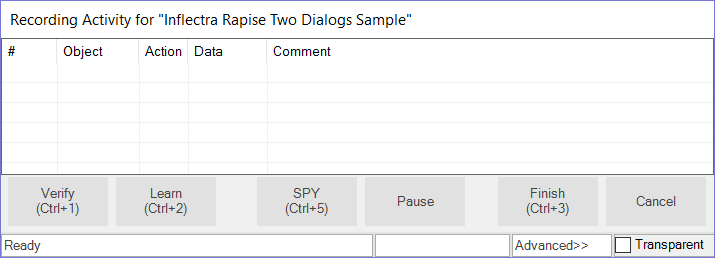
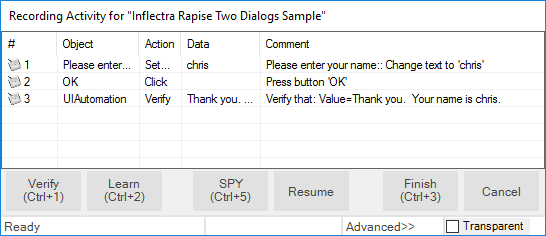
Rapise will pause while it starts the necessary background processes and connects to the running AUT. Once those tasks are complete, you will see the "Recording Activity" dialog for "Inflectra Rapise Two Dialogs Sample":
The AUT will be brought to the foreground and Rapise will be minimized.
You will achieve best results in recording if you observe the following guidelines:
- Work slowly while recording. Perform one action and wait for the results to be recorded in the Recording Activity dialog as a new line item before going to the next item.
- Use the mouse to select controls and operate them. Avoid using keyboard shortcuts and keyboard commands.
Step 6. Record the Activity in the Application
- Click the first edit box in the TwoDialogs application.
- Enter a name in this first edit box.
- Hover the mouse over the Summary field and press Ctrl+1
Rapise will open the Verify Object Properties dialog.
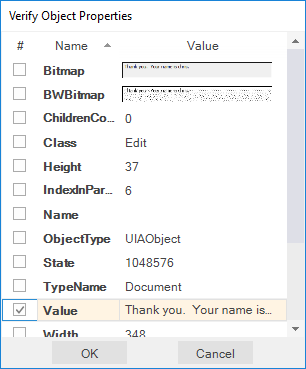
Select the checkbox for the Value property and click the OK button.
Watch the Recording Activity dialog as you operate the AUT interface. As you click a button or fill a field, notice that new entries are added to the grid in the Recording Activity dialog.
As you take these actions, you will see the Recording Activity grid update accordingly:
For a full explanation of the controls on this dialog, refer to the Recording Activity Dialog documentation.
When you have finished recording your activity in the AUT, click the Finish button or press Ctrl+3.
Note: Do not terminate the TwoDialogs application.
When you do this, the Recording Activity dialog will be closed and the AUT will lose focus.
Rapise will now ask you to confirm that you want to add the recorded steps to the current location in the test grid:
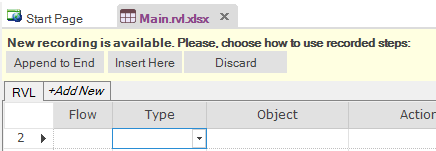
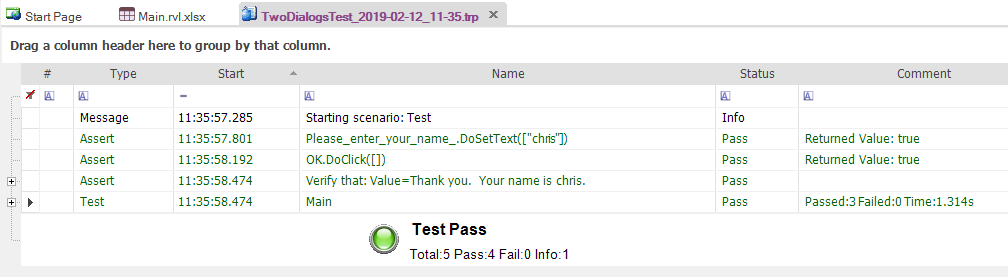
Click Append to End, and Rapise will then display the newly recorded test steps. It will look something like the following:
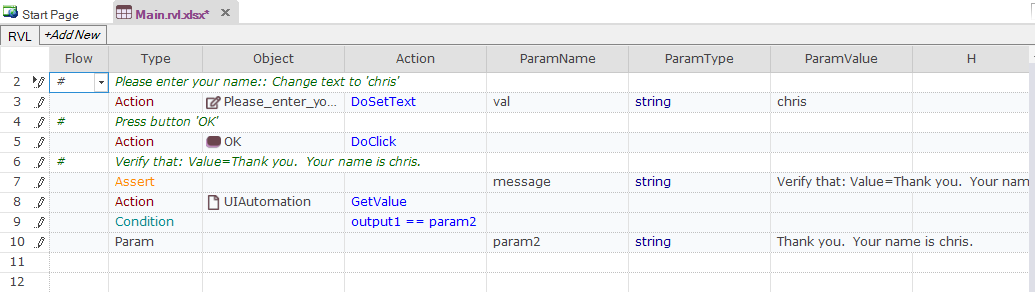
Notice that the two steps of the test are automatically documented as Action commands in the test grid. They correspond precisely and in the same order as they appeared in the Recording Activity dialog during recording. In addition, the Verify checkpoint has been recorded as an Assert…Condition set of steps in the grid.
Step 7: Execute The Test
Click the "Play" button on the ribbon or the toolbar.

As the script runs, the Rapise window will be minimized to the taskbar and you will see the results of the script's activities in the TwoDialogs application window.
At the end of the script execution, the Rapise window will be restored and the test report will be displayed:
Step 8: A Refinement on the Launching of TwoDialogs.exe.
To date, we have assumed that the TwoDialogs sample program (application) is running. If this were the case, the test script would require the AUT to be running before the script started. This would mean that the person running the test would need to remember its location. To overcome this, Rapise provides a way for the script to launch the program (AUT) before beginning the test.
Rapise comes with a series of useful Global utility objects that can perform actions such as start applications, kill processes, and access the file system. To launch the TwoDialogs application at the start of the test, go to the first row in the test grid and click the Insert Row Before icon on the toolbar:
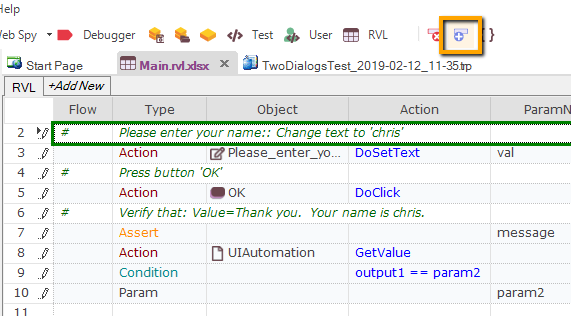
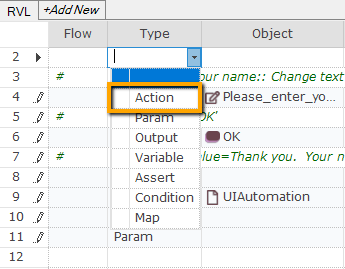
In the newly created row, choose Action in the Type column:
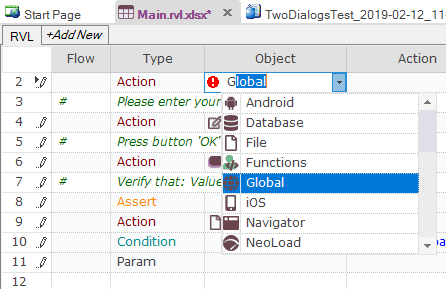
Then in the next cell, choose Global in the Object column:
Then in the next cell, choose DoLaunch and press ENTER.

Now you just need to enter the location of the TwoDialogs application into the final cell, ParamValue:
C:\Users\Public\Documents\Rapise\Samples\TwoDialogs\TwoDialogs.exe

Now if you click Play, Rapise will launch the application and then complete the recorded test steps.
Advanced Testing using the Object Spy
Sometimes you need to learn objects that are not visible or obscured by other objects. To help with this, Rapise includes the Object Spy tool. The Spy tool lets you view the objects in the application within a learnable hierarchy.
When you are in the middle of recording, click the Spy button and Rapise will display the UIAutomation Spy:
Press Ctrl+G to start tracking. Hover the mouse over one of the text boxes in the TwoDialogs application and press Ctrl+G again to stop tracking:
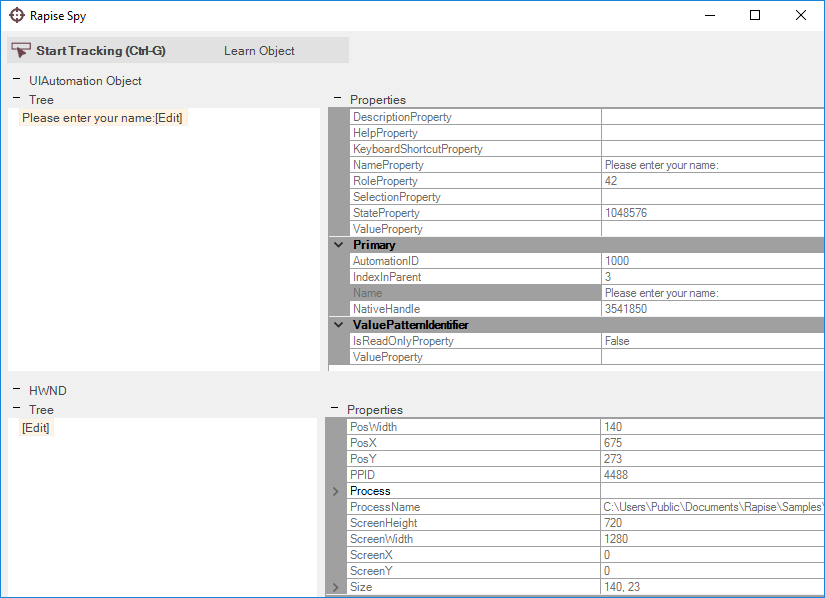
This displays the object you selected, along with its various Windows attributes. If you want to understand its position in the application's hierarchy, right-click Edit in the top-left pane and choose Parent. This will display its parent objects:
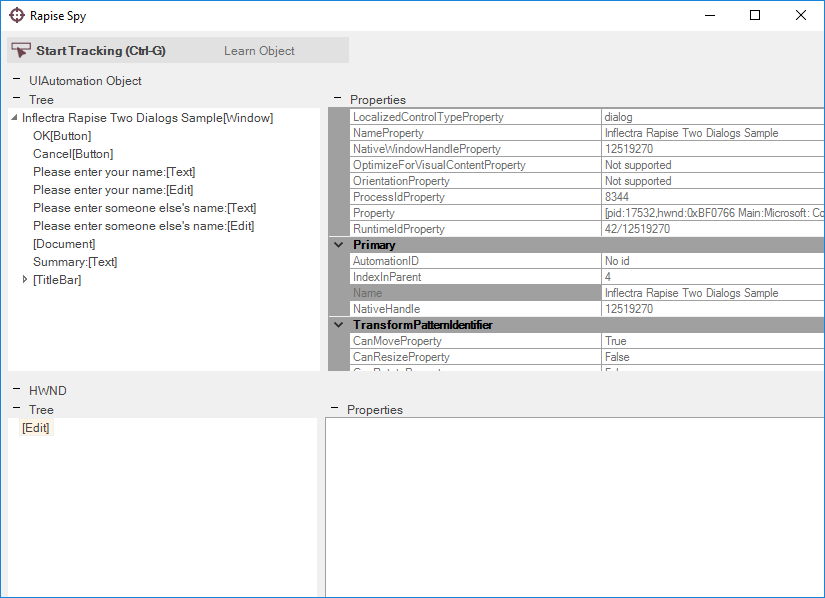
For example, in this view you can see all text boxes, the labels, and some of the standard Windows objects (the Window title bar, OK and Cancel buttons, etc.). Each of these can be expanded to show its children, and any of the objects can be Learned by clicking the Learn Object button at the top of the Spy. Once learned, you can use one of the options described above to write a test using them.