Spira Dashboard
Important
In Rapise 7, we've updated the dashboard. It now has an all-new look and new features. Learn more.
Purpose
This page displays information from the SpiraTest or SpiraTeam server to which this instance of Rapise is connected. For more details on using Rapise with either SpiraTest or SpiraTeam, refer to the separate Using Rapise with SpiraTest Guide. A copy of this guide is available in the Start > Programs menu created by the Rapise installer.
The dashboard displays information about the current Spira project, including the associated test cases, test sets, and automation hosts:
A typical Spira dashboard will appear as follows:

Each section is explained in detail below:
Spira Login/Sign-Up
This section displays the name of the currently configured Spira user (if one is configured), along with options to log in to an existing Spira instance or sign up for a new one:

- Login: Logs you into the Spira instance listed in the Connection Info section.
- Sign Up: Takes you to the Inflectra website to sign up for a Spira account.
- Auto Login: If selected, Rapise automatically logs in to Spira upon startup.
Once you log in to the Spira instance, the widget updates as follows:
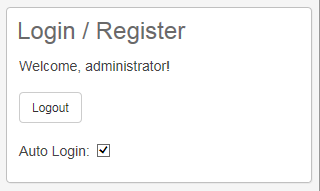
- Logout: Logs you out of the Spira instance listed in the Connection Info section.
Connection Info
This section displays the URL, login, and corresponding local repository folder for the current Spira instance (if configured).
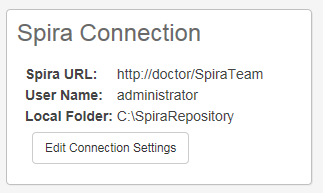
To change the current connection (or to set one up if this is a new Rapise installation), click the [Edit Connection Settings] button. This displays the Connection Settings dialog box:
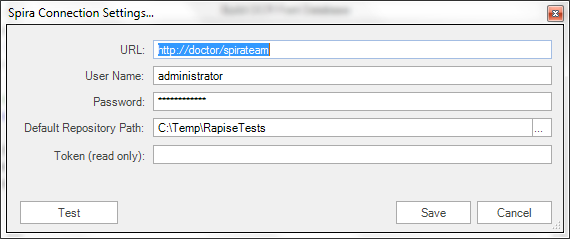
Use this dialog box to change the current Spira connection. See the topic on Spira Integration for more details.
Automation Hosts
This section displays a list of automation hosts available in the currently selected Spira project:
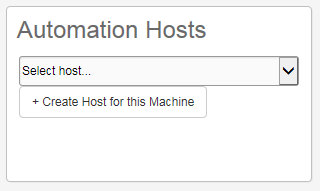
An automation host is a notional computer used by Spira to assign specific test sets to specific computers running Rapise. This allows you to schedule tests to run on different computers remotely. When you first connect to Spira, it does not know which automation host the current machine matches.
Use the dropdown list to select one of the available automation hosts:
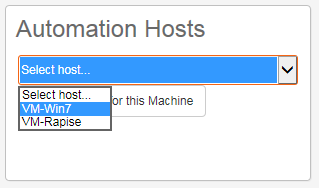
This tells Rapise that this local computer corresponds to the selected Spira automation host. Any test sets scheduled in Spira for this automation host will be executed on this computer running Rapise.
If you do not see the current automation host listed, you can click the Create Host for this Machine button to create a new automation host entry for this machine:
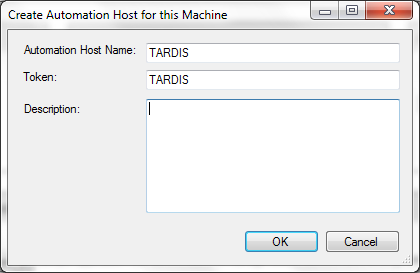
This screen allows you to enter a display name (Name), a system name (Token), and a long description for a new automation host that Rapise will create in the current Spira project. Click [OK] to confirm the new automation host.
Test Cases
This section displays a list of test cases that are either created by or assigned to the current Spira user:
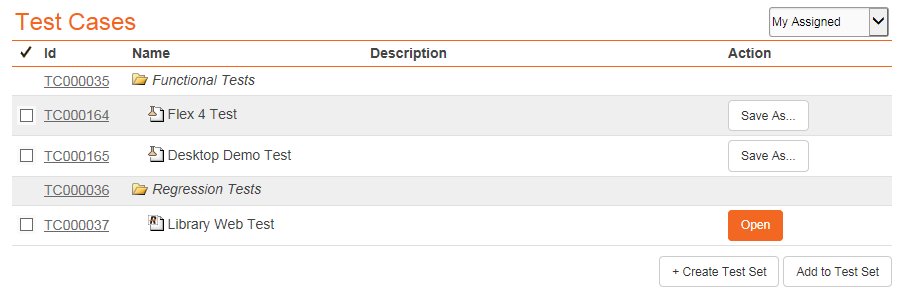
Each test case is displayed with its ID, name, and long description, along with an icon indicating the test case type:
 - Manual test case with no automation script attached.
 - Test case with an existing Rapise test attached.
 - Test case with a non-Rapise automation script attached.
Clicking the hyperlink ID opens the test case in Spira within your web browser. For test cases with a linked Rapise test, an Open button is available. Clicking this button opens the test in Rapise. For test cases without a linked Rapise test, the Save As... option allows you to save the current Rapise script against the test case.
Additionally, two other options are available:
-
Create Test Set: Clicking this button allows you to create a new test set in Spira. It displays the following dialog box when you select at least one test case and click the button:
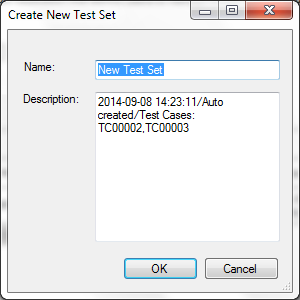
Enter the name of the test set to create and click [OK].
-
Add to Test Set: When you select at least one test case and one test set, clicking this button adds the selected test cases to the specified test set.
Test Sets
This section displays a list of test sets that are either created by the current Spira user, assigned to the current Spira user, or assigned to the automation host on which this instance of Rapise is installed:
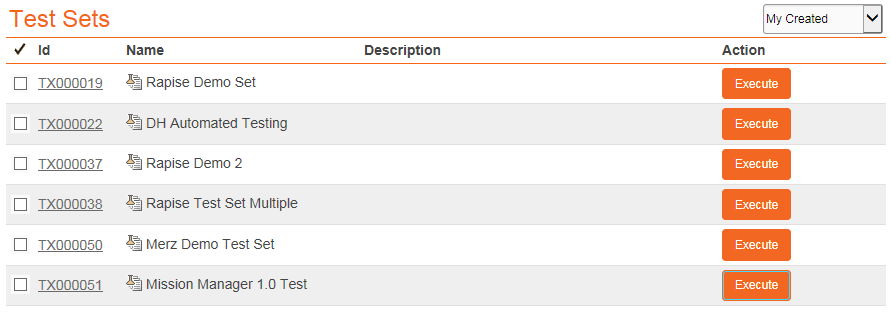
Each test set is displayed with its ID, name, and long description. Clicking the hyperlink ID opens the test set in Spira within your web browser. For test sets marked as automated, an Execute button is available. Clicking this button executes the test in RapiseLauncher. This is described in more detail in the SpiraTest Integration topic.